Amateur Radio on a Pi 4

So where to start

Since December 2020 I have been using a Pi-400 with Bullseye 64bit as my main desktop system. So much so that my Windows machine hasn’t even been turned on. Now seeing as I’m an inveterate “fiddler” I couldn’t leave well enough alone, could I ?

I the past I have used a Windows machine for AR stuff. Mostly I used the DXLab Suite which worked very, very well with all of its parts working together seamlessly which is what I i’ll be trying to emulate with the Pi-400.

Seeing as I have the Pi-400 set up with all the software I use day to day I didn’t really want to mess everything up beyond salvage so I pressed a spare 64GB Micro SD card into action.

First up was to install the operating system – PiOS Bullseye 64bit was downloaded and put on the SD card using the Pi Imager. Then I booted the new card and did all the updates and a few other customisations. I made good and sure that it was all working properly.

Next step was to work out which Amateur Radio software I wanted.

Logging, of course, some sort of rig control, digital modes ability, DXCluster, WSJTX, LoTW abilities, etc.

Once I had all of my desireabilities I needed to work out which software to use.  Confusion reigned so a deal of research was done. I came up with, for starters, flrig, fldigi, xlog, wsjtx and Trusted QSL as a starting point.

Getting started with installation

Please keep in mind that the first few iterations are all done on the SD card and not my working desktop SSD. Doing it this way means that I can, and did, just reimage the card and start again from scratch with no harm done to a working system when the inevitable happened and I messed it all up.


Rig control

First up was to install flrig and get it working. Easy. just a “sudo apt update”, “sudo apt full-upgrade” if required and “sudo install flrig”. All went perfectly.

Next was to get flrig talking to the radio which is an Elecraft KX3.

I plugged the radio in to a USB port and fired up flrig. As expected, there was no indication that flrig could “talk” to the radio. This became a recurring theme with other packages. It was easily solved by not using  “/dev/tty” or “/dev/USB”. Using “/dev/serial/by-id/usb-FTDI_FT232R_USB_UART_A70309Z2-if00-port0” as the way to go and it worked like a charm. That’s rig control sorted.

Digital Modes

Seeing as I like PSK and other digital modes I need something that can do all that. fldigi and WSJTX were the packages of choice here. To get them installed a simple “sudo apt install fldigi wsjtx” got them installed.

Getting them talking to the radio was easy using the lessons learned from the setup of flrig.

A sound card as the next issue to face. The Pi-400 doesn’t have a headphone / mic socket to use. Luckily I have an ancient, and discontinued, Griffin iMic USB sound card.

Griffin iMic

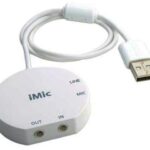
I expect that a SignalLink or other USB sound card would work just as well.

Time for a test transmission into a dummy load.

I fired up my trusty and old Yaesu FRG-100 with a bit of wire draped over the dummy load for an antenna and typed some random text into fldigi and hit transmit. Low and behold it worked perfectly. Well at least on transmit it did anyway.

Fldigi sorted.

Much the same process was followed to get WSJTX happening with the same result.

Digital modes are working so time to move on to logging.

Logging

What a head explosion this turned out to be. There seem to be two main contenders. “CQRLOG” and “Xlog”. Each was tried a number of times but there didn’t seem to be a clear winner until I looked more closely at integration with LoTW and EQSL along with fldigi. Eventually I came down on the side of CQRLOG.

Getting CQRLOG configured as a bit of a long winded affair but I think I have it sorted.

Because I don’t even have an antenna up as yet I’m unable to make QSO’s so I have nothing to log. This means I can’t test the LoTW and EQSL connectors but from what I’ve read I should have no trouble.

Now to get all of the component parts playing nicely with each other. Should be interesting.

Stitching it all together

Before I start I should say that I expected this part to be the stuff of nightmares but it was only a bad dream in parts with the rest being pretty easy.

Because I tend to dive in at the deep end I had a couple of issues that I could have easily avoided by reading the available documentation before I started messing around. I would have read, for example, that for rig control in fldigi I need to start flrig before starting fldigi.

Anyway on with the show.

Before I could start on anything meaningful I needed a few more USB ports. My Pi-400 boots from a Sandisk SSD so that’s one port gone. Another port is used by the mouse which leaves me with one USB port for both my radio (Elecraft KX3) and my USB sound card (Griffin iMic). More USB ports are needed. Enter the Simplecom SD352 USB 3.0 to Dual SATA. This device has a charging only USB port as well as three USB 3.0 ports. It also sports a couple of SATA hard drive slots. Always very handy. This means that the one available port on my Pi-400 can connect to the Simplecom dock and I can plug the radio and the sound card into it. As the data rate for the radio stuff is quite low this was a very good solution.

That’s I/O and USB ports sorted.

The next thing for me to tackle was fldigi and logging to cqrlog which proved to be dead easy. All I had to do was get the configuration of fldigi and carlog right. Also I needed an antenna of some sort so that I could test it properly. I ended up making a small transmitting loop and hung it off the curtain rail. Imaging my surprise when the very first “CQ” resulted in a call. When the QSO finished fldigi updated cqrlog and it was all good.

So, how well does it all work

One problem I had was the Pi-400 keyboard. It has to be said that it is rubbish so I gave up on the Pi-400 and used a Pi-4 4GB instead. The issue with the Pi-400 is that the “W” and the “Q” keys miss the keypress on a regular basis which is not satisfactory when using a digital mode such as PSK. The Pi-4 also has an extra USB port available as well as a proper audio input and output. I’ve stayed with the Griffin iMic though. Going with the Pi-4 also enabled me to get rid of the Siplecom USB hub which had the desirable effect of cutting down on cabling.

At this stage I repeated all the installation and configuration steps on my desktop configured SSD, after taking a full backup of course. Just for a change I didn’t mess up and it went along quite happily.

Digital modes work well and logging also works well. In fact it all works together very well. Not as well integrated as the DXLab Suite but well enough.

Next steps to complete the project

When we go away camping I always take a Windows tablet to manage photos, etc. What I would ideally like to do in the future is to take my desktop Pi-4 in a laptop style case which means I’ll have access to everything that I have access to at home. I’d also have all my radio software along as well. There are a number of Pi-4 based laptop cases around but they are pretty expensive. I’m sure that I can get hold of just a bare case with screen and keyboard. I can easiny build a well regulated power supply that will feed both Pi and the screen.

The aim is to be able to leave the Windows tablet at home and be solely Pi based.

Anyway that’s it. I’ll update this post as I go along and inevitably discover any shortcomings and mess-ups. I the mean time I’m building a small loop antenna that will look like the AlexLoop. It’ll fold up small and be very portable and quick to erect. I’ll also want power handling of around 50 watts  I have a few lengths of RG-213 co-ax as well as two suitable vacuum variable caps. I want it to be capable of being used on 20 and 40 meters at least. Again we’ll see how we go.

Why an Elecraft KX3

Everything else

Before the Elecraft KX3 was released I was using a Yaesu FT-817. I still have this radio and occasionally use it as an Echolink node. It has served me quite well but there were a few shortcomings both in the field and at home. In the field five watts and the lack of an internal ATU were my biggest frustrations. Having said that though, it’s a really portable package and gives good battery life. The two antenna connectors are very handy too. But the power connector is flimsy – I had to resolder mine – and is of an unusual size. Sure they can be got hold of easily but why not just use a more common size.

Then there’s the “blown finals” issue. The repair is easily done and the parts are affordable but why was the radio put on the market with such a glaring design fault.

Filters are an after market thing which is another frustration.

The Icom IC-703 was worthy of a look. It was big and heavy but the real show stopper was current drain on receive. It’ll suck batteries dry pretty quickly. I stopped looking at it when I discovered that.

At that stage there was no KX3 so the FT-817 was a no brainer and I got one. As I said, it’s served me very well. It’s done a number of outback, remote area bicycle trips being bounced around in a pannier and exposed to good old red dirt for weeks on end without issues. All that was needed was an antenna of some sort, an external ATU and a battery pack and it was good to go. The ATU is a home brew Z-Match using polyvaricons and a small toroid as well as some switched capacitors. It can handle the five watts from the FT-817 but I wouldn’t trust it with much more – maybe 10W at a stretch. For batteries I use a LiFePo4 pack and charger that I built up myself. Carrying batteries and charger around is something that will have to be done no matter which radio I have though.

And along came the Elecraft KX3

When the KX3 first came to my attention (before it was available) I did a lot of reading about it. It could be configured with an internal ATU and it seemed to be a Software Defined Radio with knobs which meant that with the optional filter I could have easily variable and tailorable filters. There was a 100W amplifier mooted as well as a panadapter. The more reading that I did the closer it seemed to be to what I wanted for both a portable and a home station. The only things missing was 2 metres and 23 cm both of which the FT-817 has. Given that I only rarely use those two bands that could be easily lived without. As a bonus, though, it had even lower battery drain than the FT-817 on receive.

Sure, the form factor was a bit bigger than the FT-817 and the layout was different but nothing that was a show stopper so I ordered one as a factory kit requiring assembly.

The assembly manual was spot on and I had no trouble putting it together. Following the Elecraft procedures the filter optimisation was a bit time consuming but it really is a breeze.

After a couple of nights with a glass or two of red it was ready to be fired up in anger. First impression was that the receiver was so much better than the FT-817. The roofing filter made separating signals easy. The audio equalisation (receive and transmit) made tailoring the the received audio easy.

It has a facility for up to eight macros that can be assigned. I’ve written a bit about that here.

Digital modes are a breeze – just select the right mode on the radio, plug it into the computer soundcard, load up the digital software of your choice and have at it. I use the DXLab Suite which can be used for radio control, logging, digital modes, etc.

Getting all that working perfectly was just so much easier than the FT-817. Elecraft have come up with a top notch product which suits my needs perfectly. I can use the radio as a home base radio, with the PX3 and the KXPA100, or as a portable radio when I’m out and about either in the camper or on my bicycle. With a decent antenna on the car it’ll also make a damn fine mobile radio.

A final word about the noise blanker and noise reduction. I drive a Land Rover Td5 Discovery 2. The Td5 engine has electronic unit injectors which make an incredible amount of electrical noise. With the FT-817 it was untameable. My original D2 almost had it’s own body weight of ferrite beads in it but anything less than a S9+10db signal just got lost in the din. With the KX3, careful setting of the NB and NR and a S5 signal was copyable.

The final word

Since I’ve had the KX3 I’ve got the PX3 panadapter and the KXP100 amplifier with built in ATU. It all works perfectly together and has provided me with many hours of pleasure. The inbuilt ATU manages to match just about any old bit of wire thrown in  a tree. Not the most efficient but you can make contacts, which after all is the object of the exercise.

KX3 Macros

Macros in the KX3 are incredible useful. I have eight of them – a full complement. I use them to switch between using a headset, a microphone and speaker and microphone and earphones. I also use them for setting presets for voice equalisation, compression, etc.

Here’s a table of the macros  –  KX3 Macros in PDF format and KX3 Macros in Excel format

The first five macros are assigned to PF1 and they loop back. When you get to the WSJT macro another long press of PF1 will run the DX macro. The remaining three macros are are assigned to PF2 and operate in the same round-robin fashion.

If you decide to use these macros enter them in the KX3 utility from top to bottom macro one to eight.

The macro codes are all in the Elecraft Documentation but here’s a description of my macros. The elecraft documentation is sometimes not that easy to read but all the information is there.


Macro explanations

As promised, here’s an explanation of the macros that I use. The TE directive is Transmit Equalisation and the CP directive is Compression. Please bear in mind that these two are tailored to my voice as is MG.

The headset I use is the Heil Proset that I got from Elecraft when I bought my KX3. The microphone is the Elecraft MH3 hand microphone. The headphones that I use are Heil and are the same as the Proset.

Right let’s get to it…

DX macro

TE-16-16-06+00+06+12+12+09 gives me a response curve that suits my voice and the microphone element n the headset.

MD2 is operating mode USB. MG010 is microphone gain = 10. CP015 is set compression to 15 which is very high but it suites my voice. You will probably need to reduce this. Experimentation is the key here. AG010 is audio gain set to 10. PC050 is to set power to 50 watts (I have a KXP100).  SWT19 is a short press of the PRE button on the radio which toggles the preamp on and off. As the preamp will be off by the time we get back this macro we need to turn it on again.  MN110 sets the MACRO MENU FUNCTION. SWT27 selects the macro in position 2 SWH18 is a push and hold of PF1 which assigns the selected macro to PF1. MN255 exits the MACRO MENU FUNCTION.


HEIL macro

This macro changes the transmit equalisation to values suggested in the Heilsound web site. It also increases MIC GAIN. I don’t use this one much.

MN110;SWT20;SWH18;MN255 enters the MACRO FUNCTION MENU and assigns the macro in position 3 to PF1 and exits the MACRO MENU FUNCTION.

Elecraft macro

Again, this macro changes the transmit equalisation to suite my voice and the Elecraft MH3 microphone. It also changes the MIC GAIN and Compression.

MN110;SWT28;SWH18;MN255  enters the MACRO FUNCTION MENU and assigns the macro in position 4 to PF1 and exits the MACRO MENU FUNCTION.

PSK macro

This one sets the transmit EQ to flat, sets MIC GAIN to 10, MD6 (DATA) and DT0 (sub mode A) is to set the radio to DATA A. BW0400 is filter bandwidth in 10 Hz units. Compression is zero, power is 50W and audio gain is 20. The preamp is toggled off and the string MN110;SWT21;SWH18;MN255 assigns macro 5 to PF1

WSJT macro

This one is pretty much the same as the PSK macro. As everything is set up for digital mode I only needed to reduce AG (Audio Gain) to suite the WSJT software adjustment range.

The string MN110;SWT19;SWH18;MN255; assigns macro  1 to PF1.


That’s the end of the PF1 macros and what follows is the PF2 macros.

HSET macro

MN082 is the first part of setting MIC buttons and MP000 is a bit mask so 000 turns mic buttons OFF. The ML directive sets the monitor level. Power is set to 110W. The string MN110;SWT32;SWH26;MN255 assigns macro number 7 to PF2.

MIC macro

MN082 is the first part of setting MIC buttons and MP005 is a bit mask so 005 turns mic buttons ON. The ML directive sets the monitor level. Power is set to 110W. The string MN110;SWT33;SWH26;MN255 assigns macro number 8 to PF2.

M&H macro

This macro is for when I’m using headphones and the Elecraft MH3 hand mic.

MN082 is the first part of setting MIC buttons and MP005 is a bit mask so 005 turns mic buttons ON. The ML directive sets the monitor level. Power is set to 110W. The string MN110;SWT29;SWH26;MN255 assigns macro number 6 to PF2.


That’s the end of the description of the macros. I really, really hope that I haven’t got anything wrong that could mislead.

This set of macros means that I don’t have to do anything except press PF1 or PF2 and select the macro(s) to suit the current mode or circumstances.

Enjoy and have a play to make the best use of the KX3 abilities.

If you find any errors or see any glaring omissions PLEASE leave a comment so I can fix it.


Travelling and playing radio

When we’re out and about I always have the KX3 and stuff with me. I leave the PX3 at home though. I power it all with a home built 10Ah LiFePo4 battery which gives me quite a while at 50W from my KXPA100.

Antenna is usually a doublet of about 50 feet / leg and fed with 300 ohm TV antenna twin lead. Needless to say some sort of impedance matching is required so I use a home brew Z-match ATU. The centre of the doublet is at around twenty feet on a squid pole.

Sometimes I use a 53 foot wire which is end fed via a 9:1 unun with about 20 or 25 feet of counterpoise. I prefer the doublet though. Another antenna I use a bit is 50 feet of zip cord with one conductor stripped off at 35 feet. Both antennas work pretty well for what they are just heaved into a tree if there’s one available. No trees ? I use the doublet.

One of my projects (apart from all the others) is to get a Pi 3 together for FT-8 and PSK and logging and do some really compact portable digital stuff – the thought of lugging a laptop and associated stuff around just doesn’t apeal.

VK3KW

Located in Moe Victoria, Australia in grid square QF31dt. Moe is located about 130km’s south east of Melbourne in the Latrobe Valley in South and West Gippsland.

My station consists of an Elecraft KX3 (serial 1675) with all the trimmings – KX3, Roofing Filter, 2 metre module, ATU and charger/real time clock. I also have a KXPA100 (0530) with inbuilt ATU and a PX3 (233).

My antenna is a 43 foot vertical with a few counterpoise wires with  an LDG RT/RC 100 at the base. I wish I could have a tower with a Yagi but as we are renters that’s not an option. On the boundary of the property there’s a great big Eucalypt about 30 metres tall which will quite possibly be pressed into service for one end of a random sloper of some description.

I also have a Yaesu VX-7R, a Yaesu FRG100, a Yaesu FT-817 (non ND) and an old Eddystone EB35 MKII in perfect working order apart from a bit of deafness on FM.  Sooner or later I’ll get around to fixing that though. Of course I have sundry small portable receivers – mostly Sony.

When I get around to it I’ll put up a few photos – probably about when I get around to fixing the Eddystone.