Modifications to the camper

Batteries and charging

Since we got the camper we've made a few modifications. They've all been to the 12V system so far. Due to a past association I've been able to get Victron stuff at a very keen price so it's all Victron, of course.

First thing that we did was to fit a DCDC charger. The camper had an Anderson plug installed that connected directly to the batteries. A Victron Orion-Tr Smart DC-DC Charger  was chosen and duly installed in the cabinet with the distribution panel. I simply cut the cables from the Anderson plug to the batteries and wired in the DC-DC charger. It can be configured and monitored via a Bluetooth app.

The next step was to put a decent solar regulator in. The regulators supplied with most solar panels are cheap and nasty affairs that would be better off in the spares box for emergency use. Again I chose Victron. I installed a Victron Smart Solar MPPT 100/20 which does the job very nicely. Installing it was dead easy - solar input via a red Anderson plug, the load connected to the power input of the distribution box and the battery output connected to the batteries. This controller also gives you the ability to controlled the load via a Bluetooth app.

Next cab off the rank was a 240V 12V battery charger. Again Victron was chosen. This time it was a Blue Smart IP22 Charger from Victron. Installation is dead simple. The output to the batteries and the input to a 240V mains socket that is already wired into the battery cabinet. Again this is able to be configured and monitored via a Bluetooth app.

The next step was to have a look at the batteries. We have two 100Ah AGM's in parallel which gave us about 100Ah usable capacity although we have been guilty of running the way flatter than that - down to about 10%SOC. While there is nothing wrong with the AGM's - they're only about three years old and haven't been overly mistreated - we'll stick with them. When the time comes to replace them, in five or so years I reckon, I'll be replacing them with the relevant Victron LiFePo4 offerings.

By having good charging capabilities and good battery monitoring we can manage our power off grid much better. We can last about four days without a recharge as our power requirements are modest. With our 250W and 100W panels connected in parallel on a full sun day we can be fully charged well before lunch so we have a considerable comfort margin. If we have a series of zero solar harvest we can always start the car and use it to get at least enough charge to keep us going.

The kitchen tap

In our slide out kitchen we have a cold water tap. With the pump turned on if you lift the tap the water flows. There are a couple of issues here.

  • If you’re trying to do the dishes and you lift the tape to get it up and out of the way you put more cold water in the sink.
  • Lifting the tap is quite hard and tends to turn the tap mount up so that the kitchen slide can’t be closed.
  • The switch for the pump is at the distribution panel on the other side of the camper which is a pain if you need to turn the water on or off when you’re at the kitchen.

Fortunately there is an easy solution. The pump is in the storage box under the seat in the rear of the camper right next to the kitchen. It was an easy matter to put an external waterproof switch right next to the kitchen slide. All I needed to do was to drill a hole for the switch, cut the +ve wire to the pump, crimp on a couple of female spade connectors and connect it all up. Now we can turn the pump off from right next to the kitchen sink. Much better.

A new jockey wheel

we quickly discovered that the original jockey wheel sunk into soft ground a LOT so we started the hunt for something better. We eventually ended up getting Ark XO 750 jockey wheel.  Here’s a pic.

ARK XO 750 Jockey Wheel

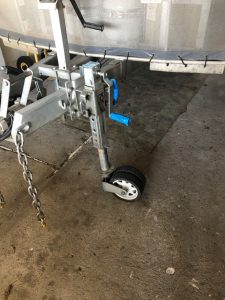
This new jockey wheel allowed us to easily push the drawbar sideways to line up the poly block coupling. It’s got a heap of vertical travel which makes it easy to get the camper level on uneven ground before we put the stabiliser legs down.

My view is that if you’ve got a pretty heavy ball weight and a poly block coupling this is the jockey wheel for you.

A winch to help closing the camper

Neither Jenny or I are what you’d call tall or strong so closing the camper posed a problem.

Being a forward fold camper the bed end needs to be lifted over the centre and down onto the lounge section. Using muscle power alone we can get it up to about 30deg from horizontal but no further – we simply don’t have the height or strength. It’s alright for the boys at Balance Trailers (where we got the camper) – they’re six foot balls of muscle.

A cheap, 1000lb winch from ebay was the answer. The boys at Balance Trailers made up a bracket and fitted the winch mounting, the winch and an anchor point for us.

Winch
Anchor point

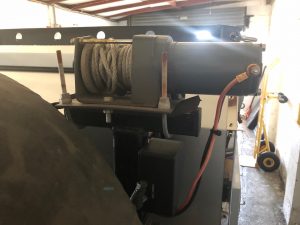
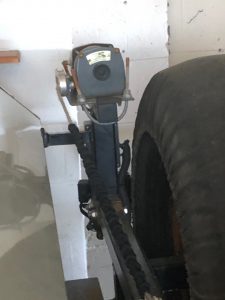
It was a simple matter to wire it into an Anderson plug and use a fly lead from the battery box. The big advantage was that the winch has a remote control which enables us to quickly fold in the canvas as it goes up and over.

Once it goes over the vertical it falls into place and we go around pushing the canvas in and then close the camper up.

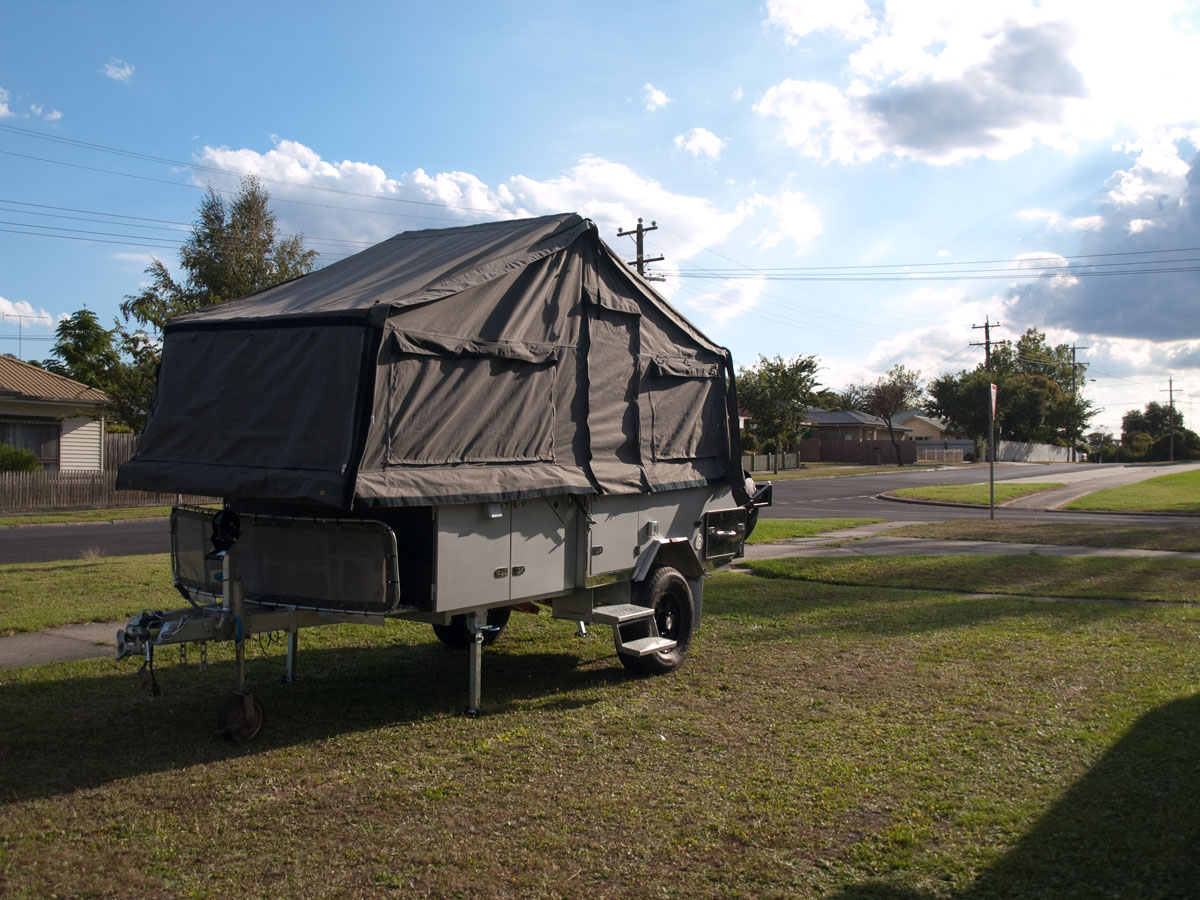
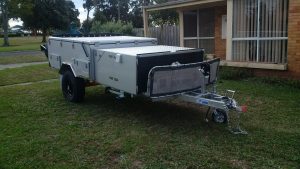
Here’s a couple of pics. One of the camper erected and one of it closed. I reckon you’ll be able to see the issue for us shorties.

Camper when erected
Camper when closed


Leave a Reply

Your email address will not be published. Required fields are marked *