Raspberry Pi and TVheadend

How to turn a standard definition TV into a HD TV using TVheadend

What you’ll need to get TVheadend up and running

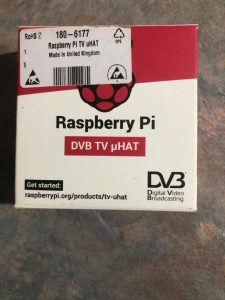
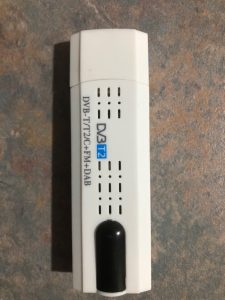
A Raspberry Pi 4 and a Raspberry Pi DVB TV Hat or a DVB-T/T2+C+FM+DAB dongle. You’ll also need a TV with HDMI input to plug the whole shooting match into.

The first thing to do is to get Raspbian installed and updated to the current standard. I didn’t pay any attention to secure passwords, etc. as this Pi is not going to be connected to the internet directly. Access is only going to be from the home network.

The next thing to do is to plug in either the Pi TV Hat

TV Hat

or your dongle.

DVB-T/T2/C+FM+DAB dongle


Next step is to install TVHeadend – “sudo apt install tvheadend” will get the job done. Before you start on the next step a very important step is to plug the antenna into either your TV Hat or dongle.

Getting it configured

When you are installing TVHeadend be sure that you select a username and a password combination that’s dead easy to remember.

When you’ve got it installed break out your trusty web browser and go to https://x.x.x.x:9981. The x.x.x.x could be localhost if you are doing it from either a TV or monitor connected to the Pi or it could be another system connected to your home network. In either case you’ll be prompted to supply the username and password that you specified during the TVheadend installation. You’ll be presented with a configuration page which is easy to work through. There’s a wealth of info at tvheadend.org which will see you right.

At this stage you should have an Electronic Programme Guide (EPG) visible in your browser and now’s the time to test it to see if it all works. If at this point if you have no success go back to the TVheadend configuration. It took me a few iterations to get a handle on how it works. Once you can see the EPG you’re home and hosed.

Be aware though, you really do need a decent TV antenna to get it working. I don’t think the receivers in either the dongle or the Pi TV hat are very sensitive. Another problem that I ran into was getting the correct region to scan. I started out using “au-other” which was incorrect. When I used “au-Melbourne” it worked as advertised. Like all of my other issues, it was my faulty configuration.

Testing and Job Done

At this point yould be able to select a programme in your browser. You now may have problems getting your browser to support the stream from TVheadend. Don’t worry, salvation is at hand in the form of VLC which can play network streams.

Just install it on the system that uses your old, slow, standard definition TV. Open it up and go to “media -> Network Stream” and enter the followung “https://username:password@x.x.x.x:9981/playlist/channels.m3u” where “x.x.x.x” is the network address of the system that uses your TV as the display. Or any other system on your local home network. You may have to select “View -> Playlist” from the menu to get the playlist. From there you just select the channel that you want. Double click on it and hit full screen mode.

Be aware though, you’ll need a high speed network connection between the system with TVheadend and the system with the TV attached. Of course if the system with TVheadend is directly connected to the TV then this is redundant.

With this setup I can take my tablet down the back yard to the BBQ area and kick back with the cricket and a glass of wine or two. I can’t watch HD TV there though – I’m only just in range of my 2.4GHz wifi which doesn’t quite cut it but hey, it does the job.

Sit back with a glass of your favourite and watch the programme of your choice in HD whilst congratulating yourself on a job well done.

The second last word

Since I got it working I have acquired a few Pi Zero’s for one thing or another and one of them has been pressed into service as my TVHeadend “Server” so I have a dedicated Pi Zero for TVHeadend.

It works every bit as well as the Pi 4 and it just sits alongside my media player Pi 4 behind the TV with only two connections – TV antenna and power. CPU utilisation is around 30% and the temp is around 40 deg C with them ambient at around 20 deg C.

The last word

If you’ve had a poke around this site you’ll see that my wife and I do a fair bit of travelling. One of the things that we take with us is a smallish 12 volt TV and an antenna. Sometimes, however, we get to a place where there is little to nil TV reception. No problem.

I’ve set up port forwarding on my router to allow a connection to my TVHeadend Pi. Using an app called “tvhclient” we can watch TV on my iPad or our iPhone’s. Although we use iPhone’s and an iPad the app is also available for Android. I’ve sort of tested it but the Android tablet I have is of such low power that it’s unworkable although it can get the channel list and attempt to display something.

In areas of good mobile phone signal we can watch high definition TV but usually it’s standard definition only. Of course the only programmes that we get to watch are those that are available on free to air TV at our home base though.

If we find a programme that we really want to see we can set TVHeadend to record it for us and then download it to my iPad and watch it at our leisure.

What seemed like a hare-brained idea turened out to be a good workable solution to what was a tiny problem.

This whole Raspberry Pi thing is getting more complex by the day such is the versatility of these small computers.


7 thoughts on “Raspberry Pi and TVheadend”

  1. Did you have to do anything special to get it to work on the Pi zero?
    I have tried it, and it keeps maxing out the CPU, which causes stutters every couple of seconds.

    1. I don’t know how you’re viewing TVHeadend. Are you trying to view it on a screen attached to the Pi Zero ? If you are that’s likely to totally swamp the little Pi Zero and it’ll be completely unsatisfactory. I view it in VLC Media Player on another system and it works perfectly. Just point your browser (on another system) at http://your_pi_address:9981/extjs.html# and go from there.
      Cheers

      1. Thanks for the reply. I am already doing what you suggested, but the little pi is not coping!
        I’ll have to try some other things.

        1. I red that Pi Zero does not have HEVC support etc. so it have to be used only to get the TV signal and transmit it over network to the device/s with necessary codecs support (like Pi4) which can decode H264, H265, play the stream.
          Btw. i had Rpi4 with Raspbian+XFCE desktp+Kodi and it was quite slow (navigation in Kodi and boot) when comparing to LibreELEC+Kodi.

          1. I only use the Pi Zero to stream. I use a Pi-400, a Pi 4, a Windows laptop or an iPad to play the stream. Mostly the iPad when we are travelling and we can’t receive a TV signal or I just can’t be bothered setting the TV an the antenna up.
            It works quite well via the Telstra 4G mobile phone network.My uplink speed is around 15 Mbps. It also works very well via my home WiFi.

Leave a Reply

Your email address will not be published. Required fields are marked *