So you want to be a Nomad

How are you going to do this

For a neophyte the choices are bewildering. You can choose sleeping and sheltering in the back of the car, a swag, a tent, a rooftop tent, a ute and a slide on camper, a camper trailer, a small caravan, a complete palace on wheels or a motorhome. Do you want to tow something or not ? Is set up and pack up time a limitation ? What are you physically able to do in the way of set up and pack up ? What vehicle are you using and how much can it carry and / or tow ? Are you going to be living in your rig full time or for extended periods ? Do you envisage rough and extended outback trips ? Are you only going to use the rig a few times a year for holidays ?

Once you get into the realm of travelling by bicycle or motorbike or camel or on horseback or something else, the choices become even more bewildering. I’m going to limit this post to the choices concerning a car of some description and some sort of camper trailer as that is the area that I have experience in. The rest is in the province of people with more experience than I.

See, lots and lots of questions and this is only the tip of the iceberg.

Doing it by car or How We Did It

I’m assuming that you’re going to be using a four wheel drive vehicle of some sort towing a camper trailer of whatever variety.

At this stage you’re faced with two big unknowns. What are you going to tow and what are you going to tow it with. If you have a bit of a think about it you really need to know the answer of one before you can know the answer to the other.

Now is the time to put a lot of thought in to your expectations for the vehicle and the camper. Are you going to stick to the bitumen or are you going to try the likes of the Tanami and Gibb River Roads or the Birdsville and Oodnadatta Tracks ?

We decided on the latter which meant that we needed to be looking at campers that can take a lot of punishment. A strongly built and durable camper is going to weigh a bit so we needed a vehicle that would be able to tow it. This is where past experience came to our aid. I’ve had a lot of good times with Land Rovers and over the five that I’ve previously owned I’ve never, ever, been left stranded. They’ve always managed to get me home so we hunted down a manual Discovery 2 Td5 diesel. Whilst towing a Discovery 2 has a good Gross Combination Weight, a maximum towing weight of 3,500kg and will support a ball weight of 250kg.

After much searching and many test drives we found a good one that was cheap. It had a couple of issues that needed seeing to which still made it a cheap car.

Now came the search for a camper.

So how did we decide on a forward fold camper

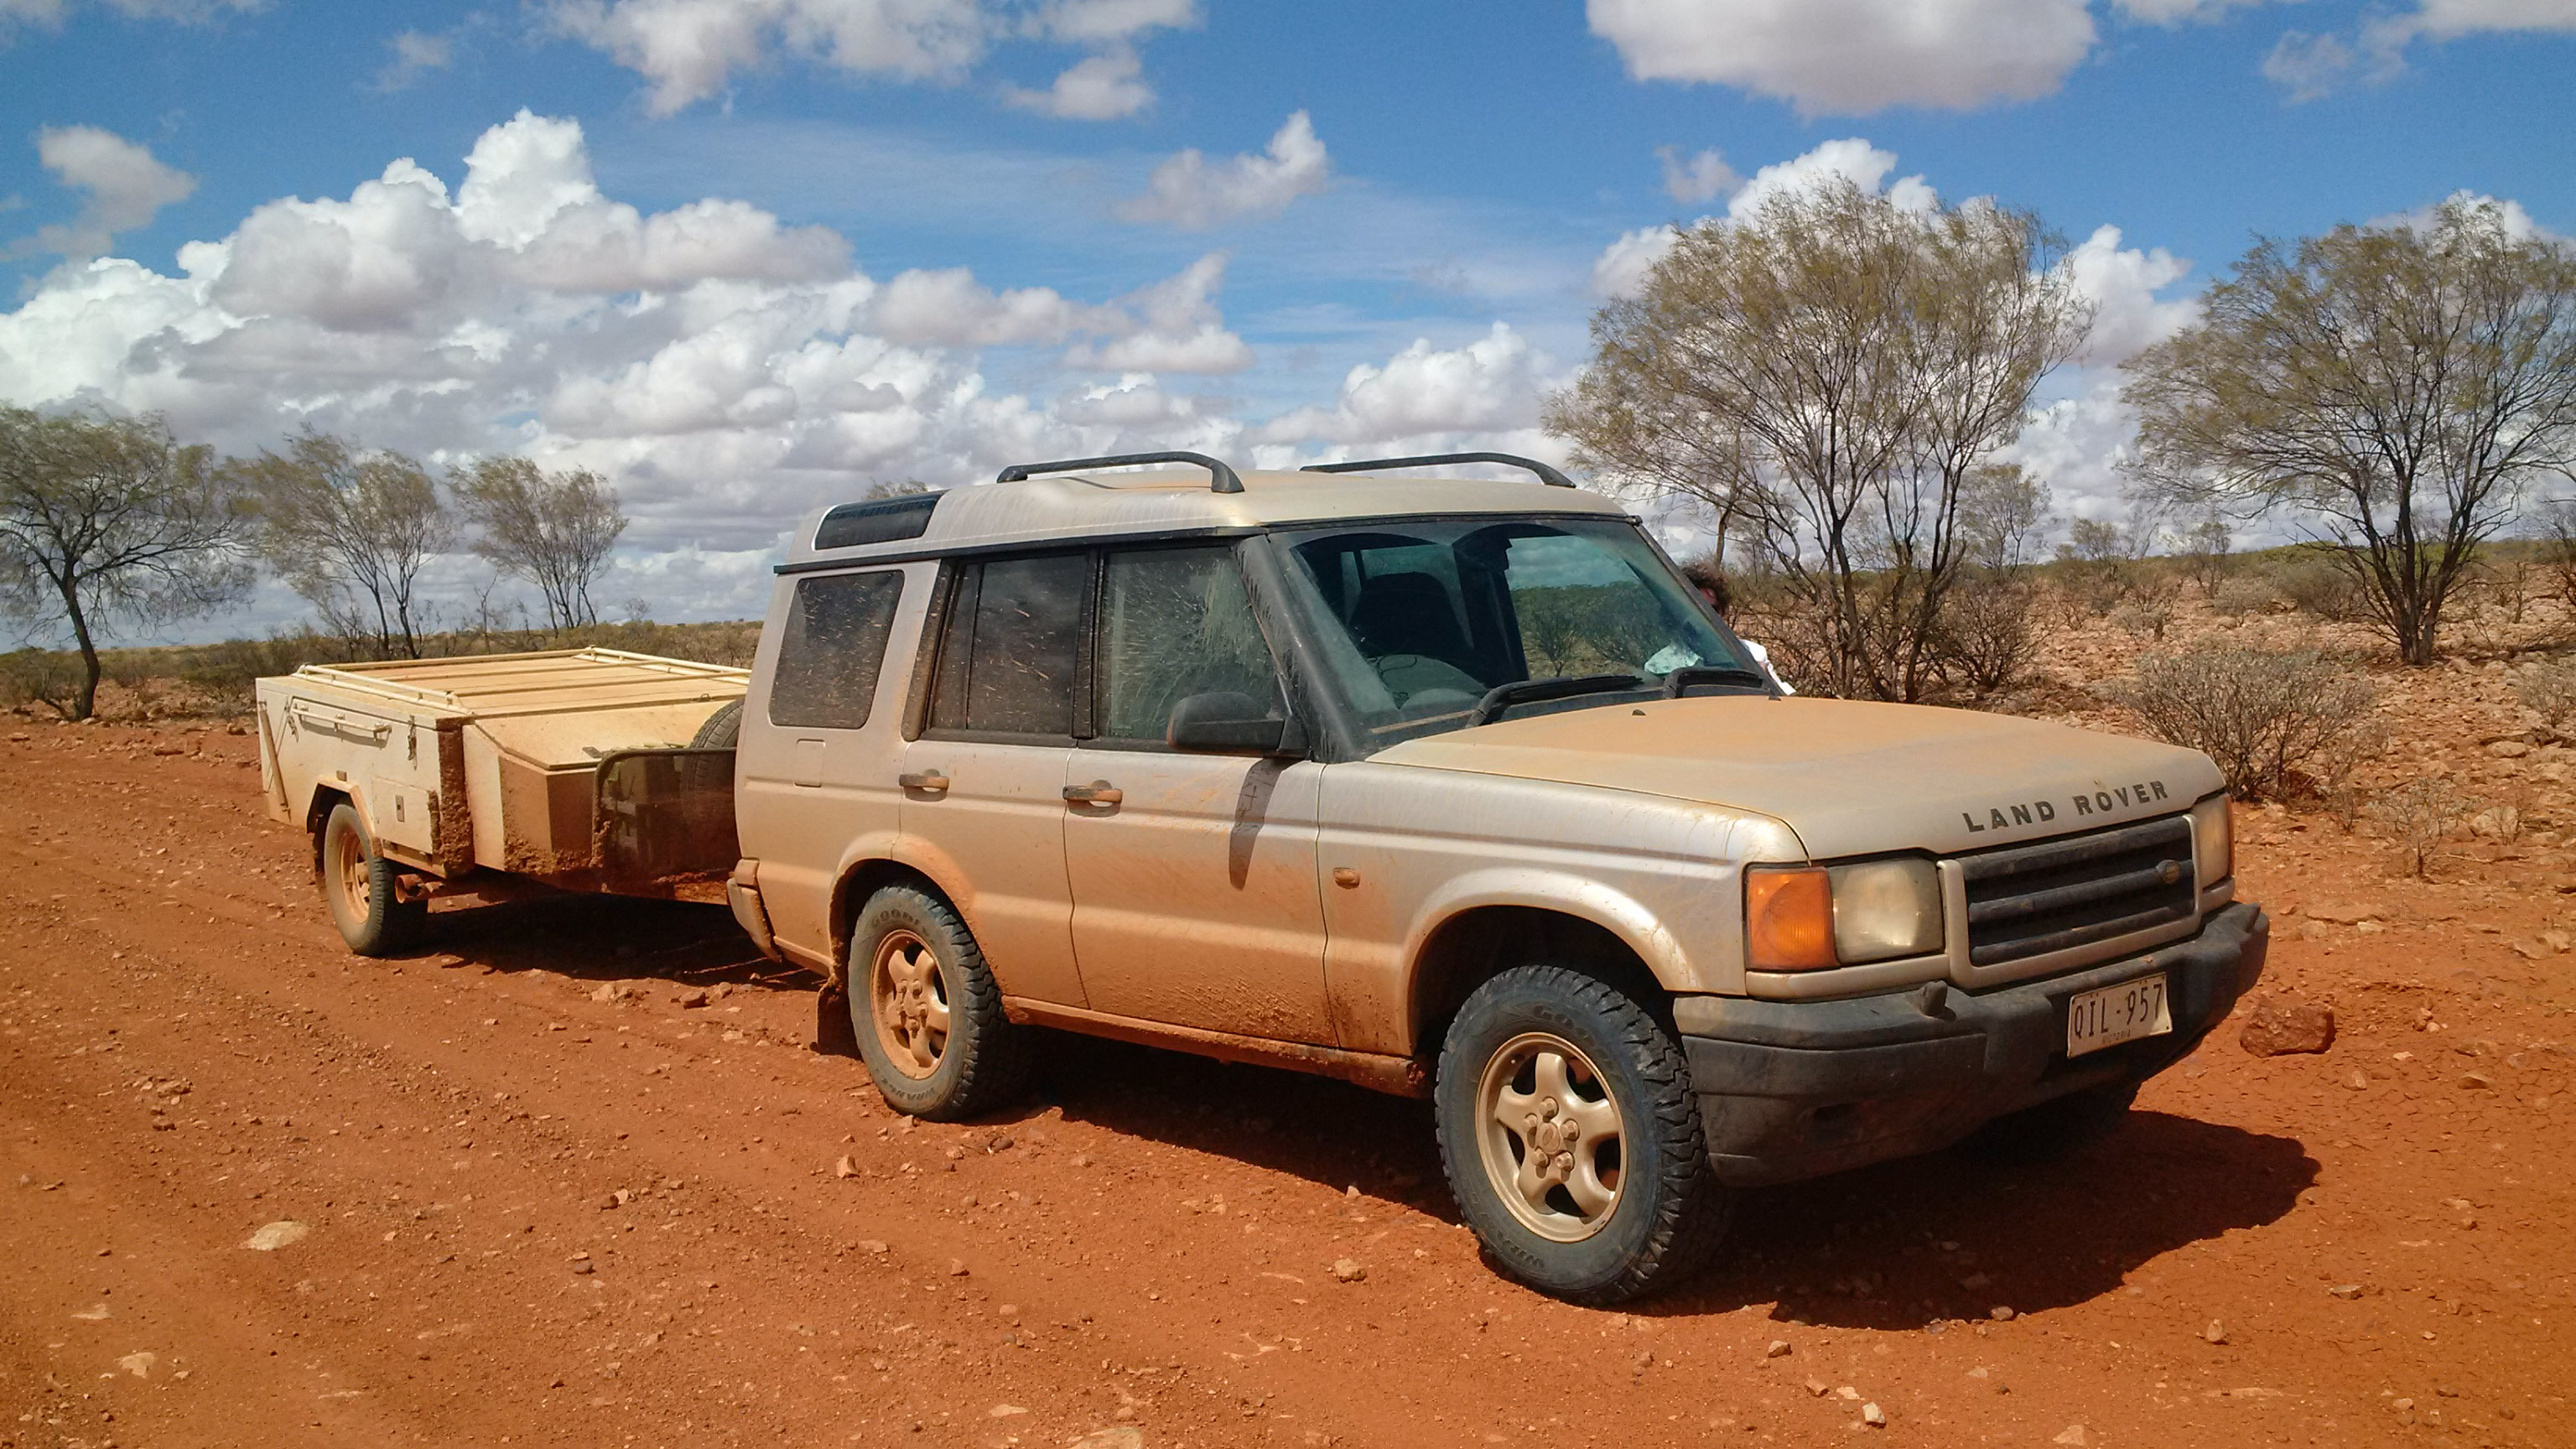
Well, first of all we decided that we wanted to travel on roads that are questionable to say the least. The Birdsville, Oodnadatta and Strzelecki Tracks and the Great Central, Gibb River and Tanami roads for a start. That meant a small-ish caravan that needed to be solid in the extreme. There are such caravans on the market but the price – oh dear. We are on limited and fixed incomes and to spend the amounts being asked would just about clean us out and leave us living in poverty. Even second hand would be beyond us. Scratch that idea.

So we started looking at camper trailers. We looked at a couple of soft floor campers and whilst they satisified our requirements concerning size and weight they had a lot of constraints that we weren’t willing to live with. Time and effort to get set up and to get packed up, the issue of dust and mud being tracked inside, etc. We looked at a lot of youtube videos of setup and packup and decided that a hard floor was the way to go.

We thought that a cheap second hand camper of either rear of forward fold design would be a good starting point so the scouring of the classifieds started. Eventually we stumbled across a very affordable Indigo rear fold camper and went to have a look at it. The seller had maintained it very well and had really looked after it so money changed hands and we took it home.

Indigo Camper

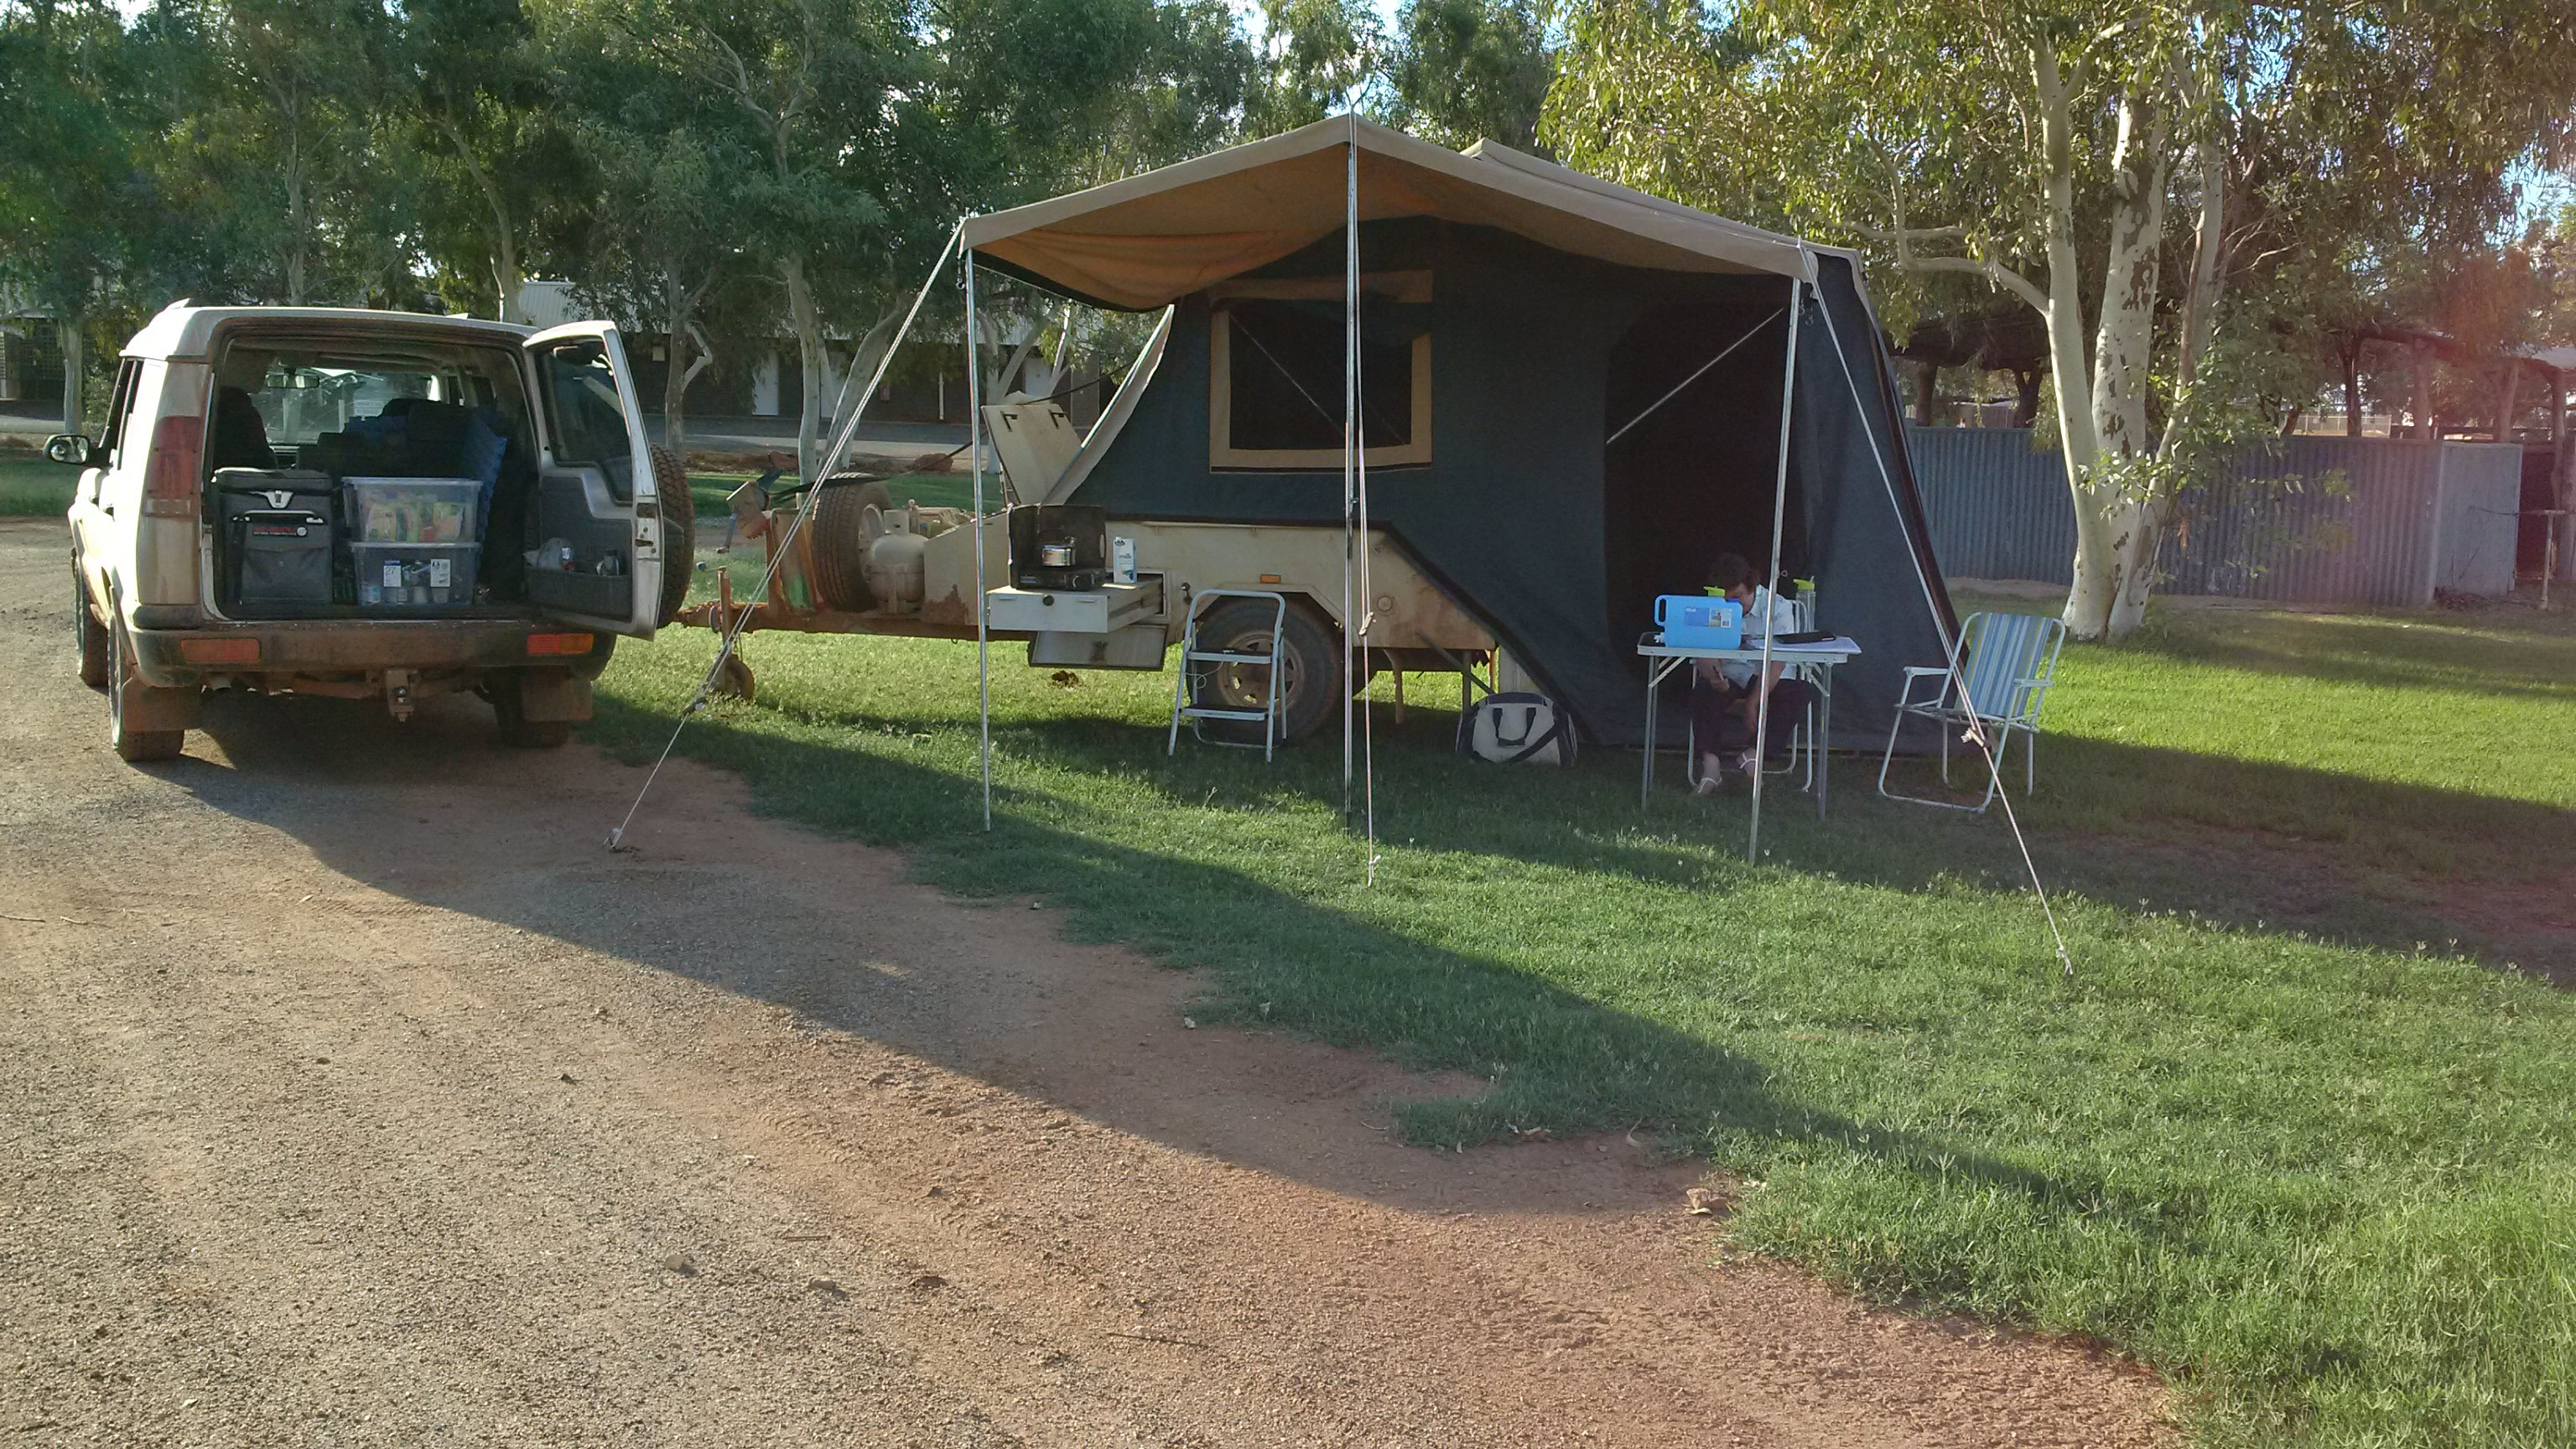
It was light, easy to tow, waterproof and easy to set up. The drawbacks were many including that there was no storage for the fridge, no real kitchen, no pantry storage space, etc. The lack of storage meant that were right on the edge of the car’s GVM so we had to be really careful with what we packed. We had some great trips with that camper until the chassis broke. It gave way while we were getting set up at Bourke and thankfully we were able to get it welded up enough to get us home on bitumen roads. Although the welding was a solid job we couldn’t trust it to get us to and from where we wanted to go so it had to go.

The search then started for our “forever” camper.

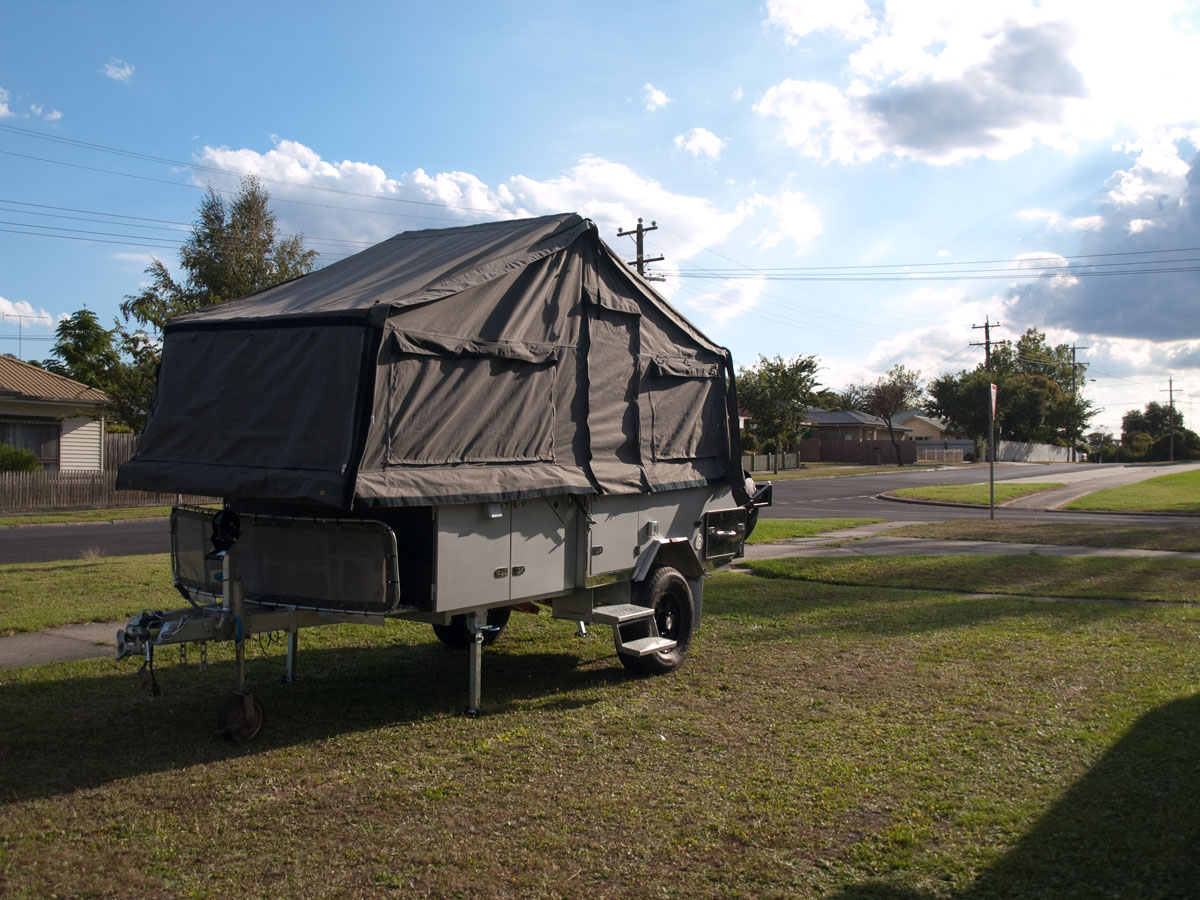
We decided what our budget was and started looking at all sorts of hard floor campers. We found a lot in our price range too. The second hand, name brand, campers all appeared to have had a hard time and had defects that would need attending to before we’d be happy with it or they were cheaply built and the asking price was unrealistic for what they were. We looked at a few name brand new campers too and the price was above our budget or they were cheaply built. During the search we looked at a few forward fold campers and we liked the storage space and the interior lounge area with a built in table and seating so we started to concentrate on forward fold campers.

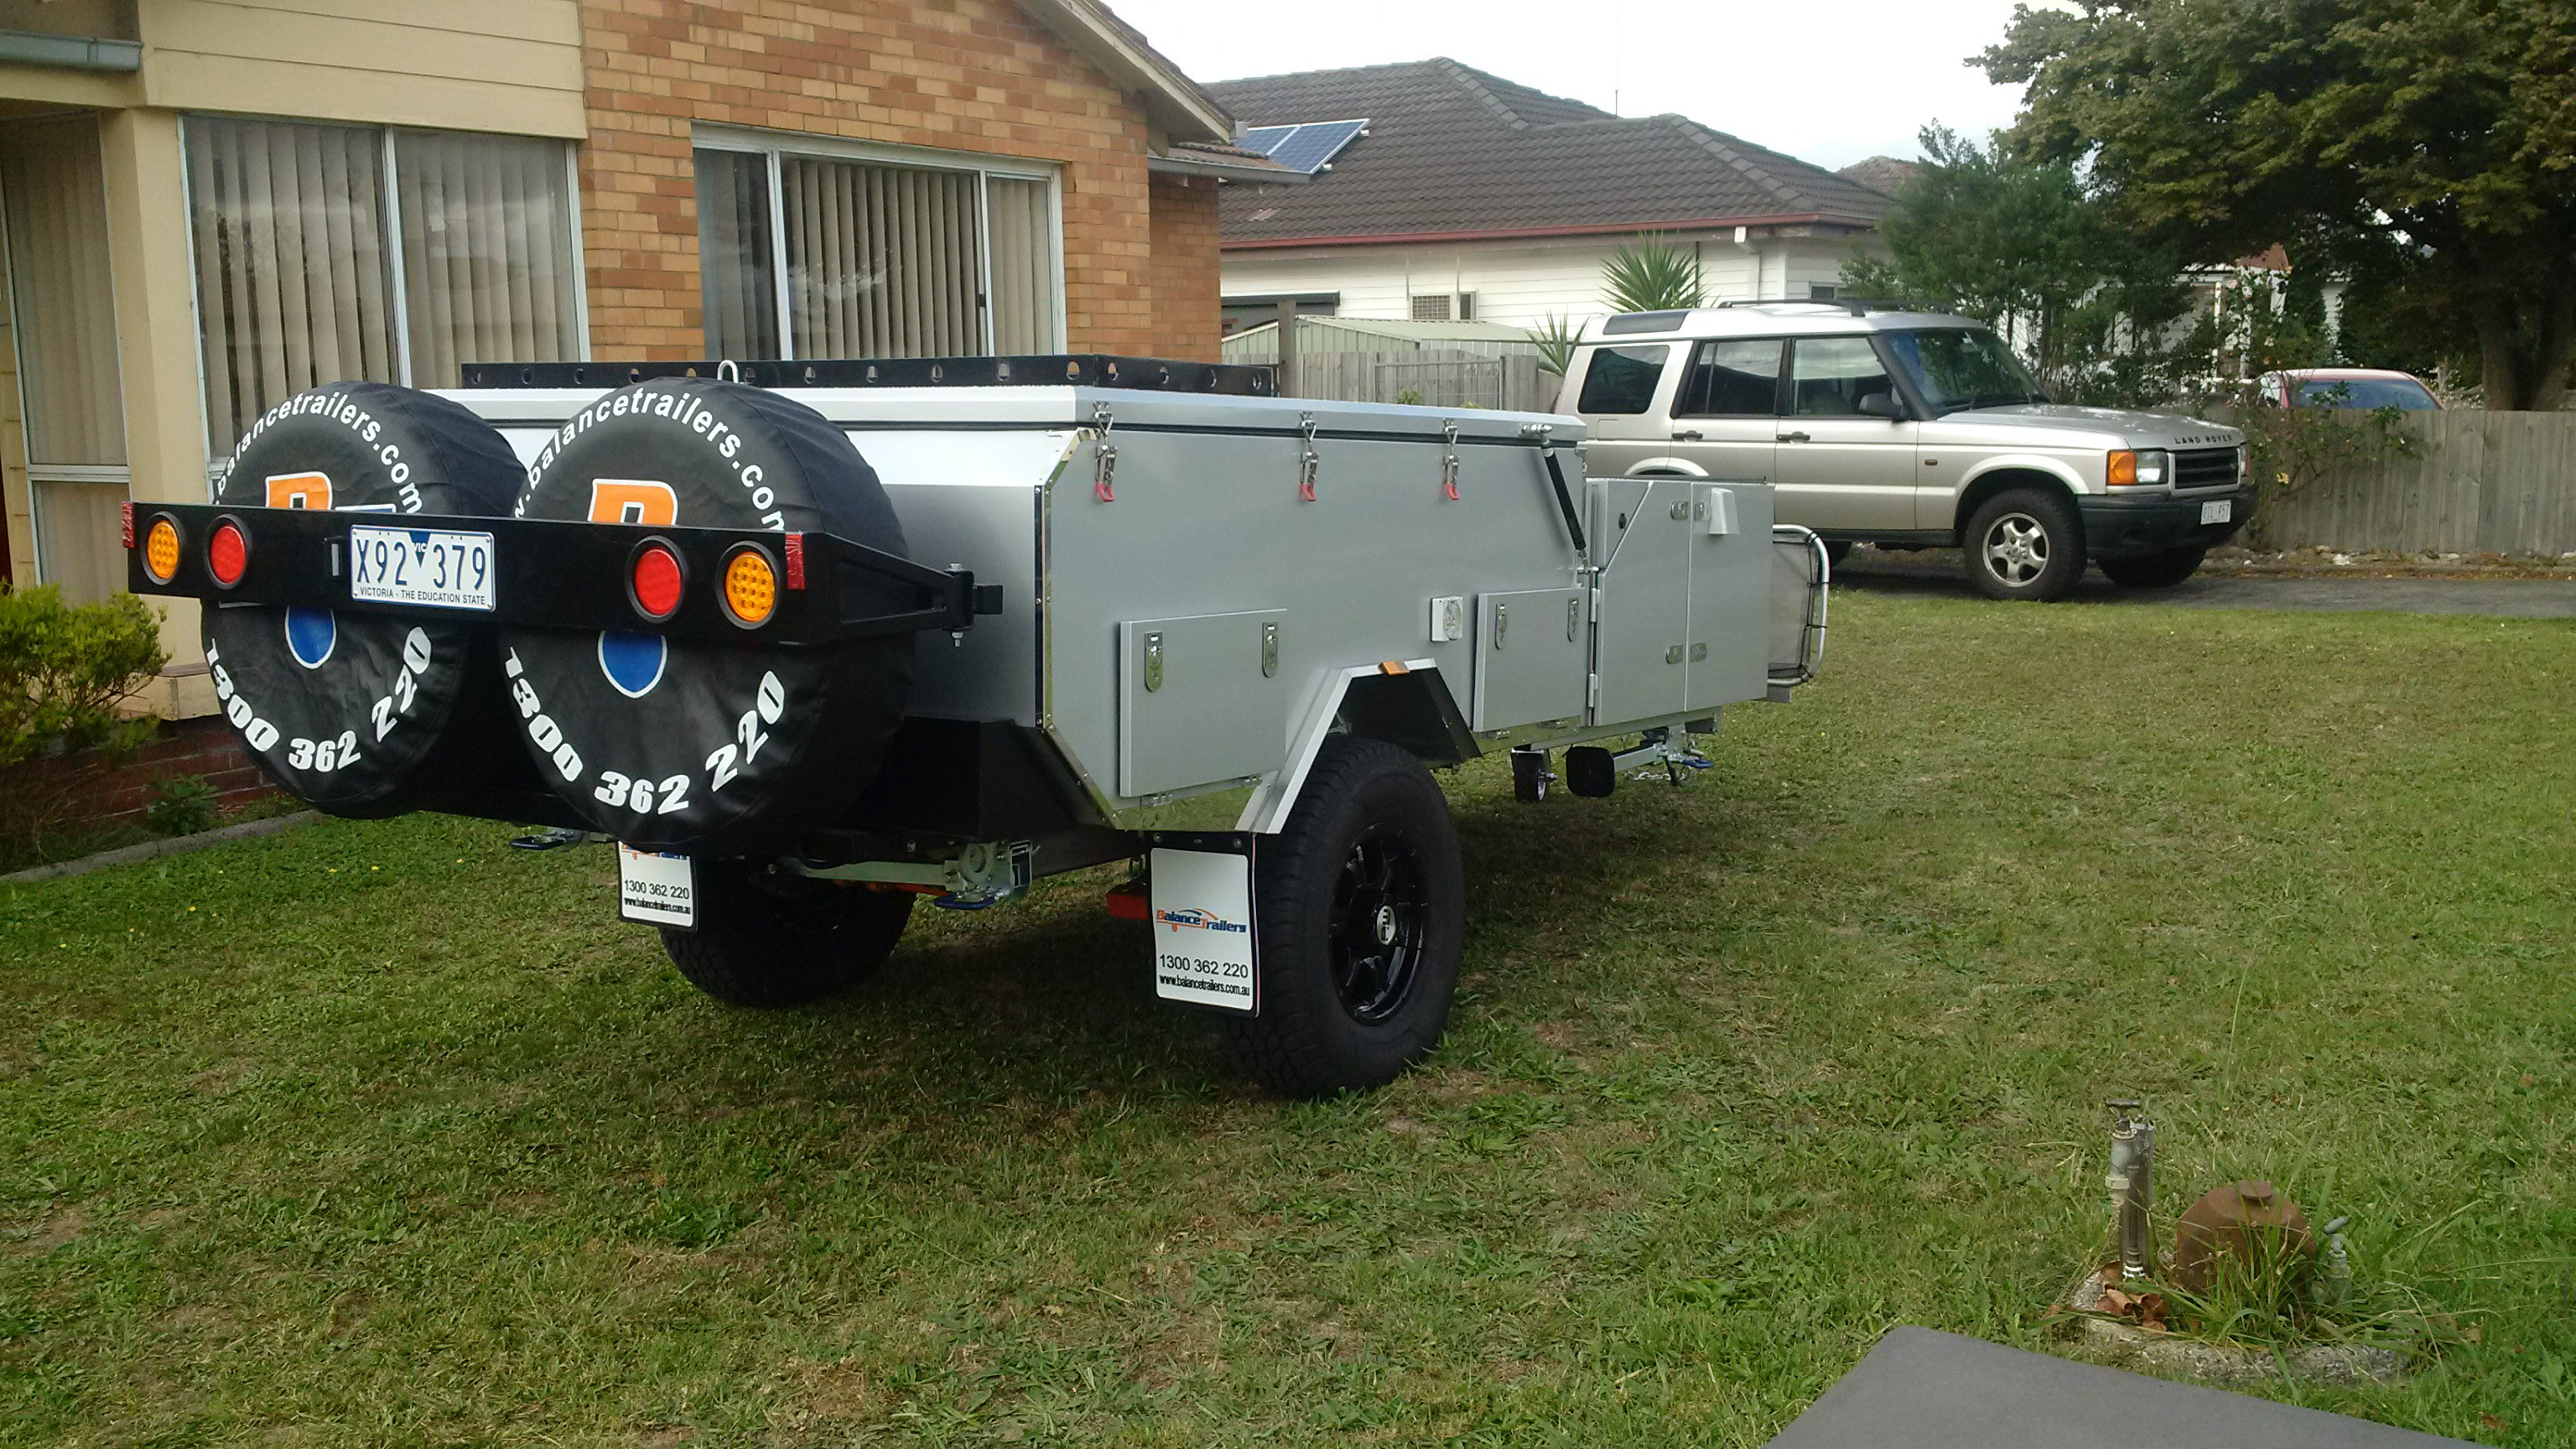
Once again the second hand market had the same issues as the rear fold second hand market so we started looking at the new market. After much looking and rejecting, usually due to cheap and nasty build and materials we stumbled across Balance Trailers.

A lot of the new camper sellers seemed to need to supervise us while we looking – crawling around underneath, poking around the inside, measuring storage spaces, etc.

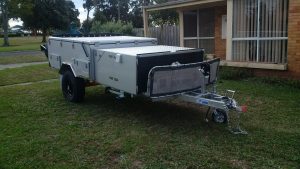
The guys at Balance Trailers were different. They gave us a sheet of paper with all the specs – weights, dimensions, etc. and said that they’d leave us to it to have a good look. The fit and finish was excellent, the welding was neat and clean with no evidence of angle grinder marks and it was built like a brick outhouse. We had a load of questions which were all answered without any if’s, but’s or maybe’s. We asked about the setup and pack up and the demonstrated that for us and the asked us to pack it up and the set it up while they watched. They supplied a certificate of electrical safety as well as a gas compliance certificate. They also supplied recent weigh bridge certificates for tare and kerb weights – axle and tow ball weights separate.

At no stage were we asked about money or pick up dates. It was a total, no pressure sale. In the light of subsequent events these guys also stand behind their product too.

So we went ahead and got it – after a bit of price haggling of course. It was within our budget and has proven to be exactly what we were after.

Camper from the rear
Camper from the front


All set up

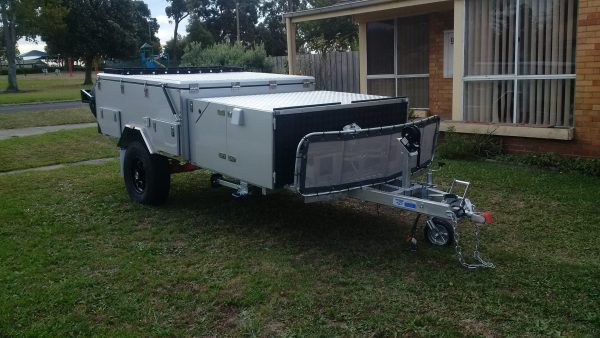
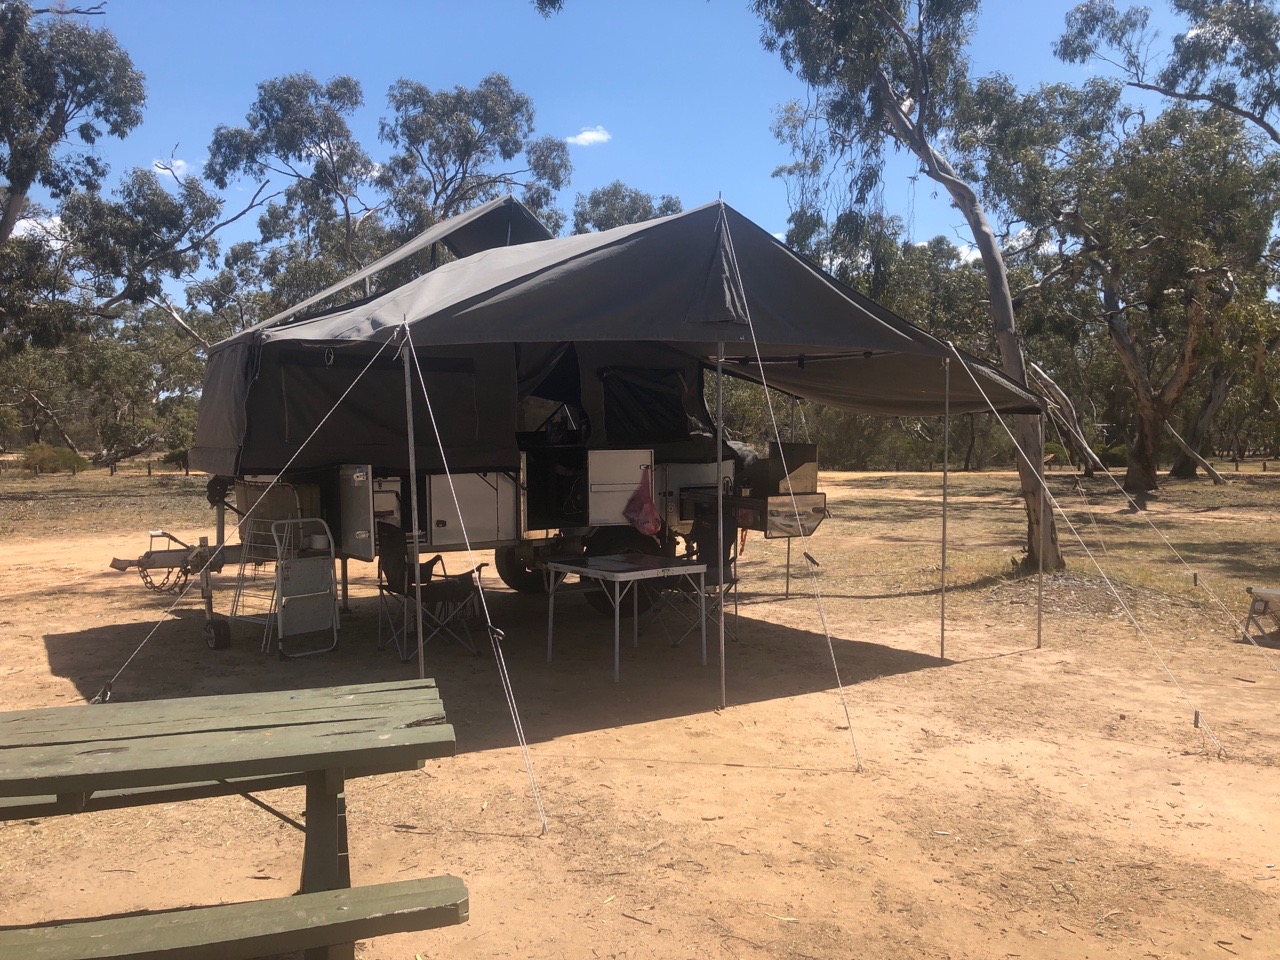
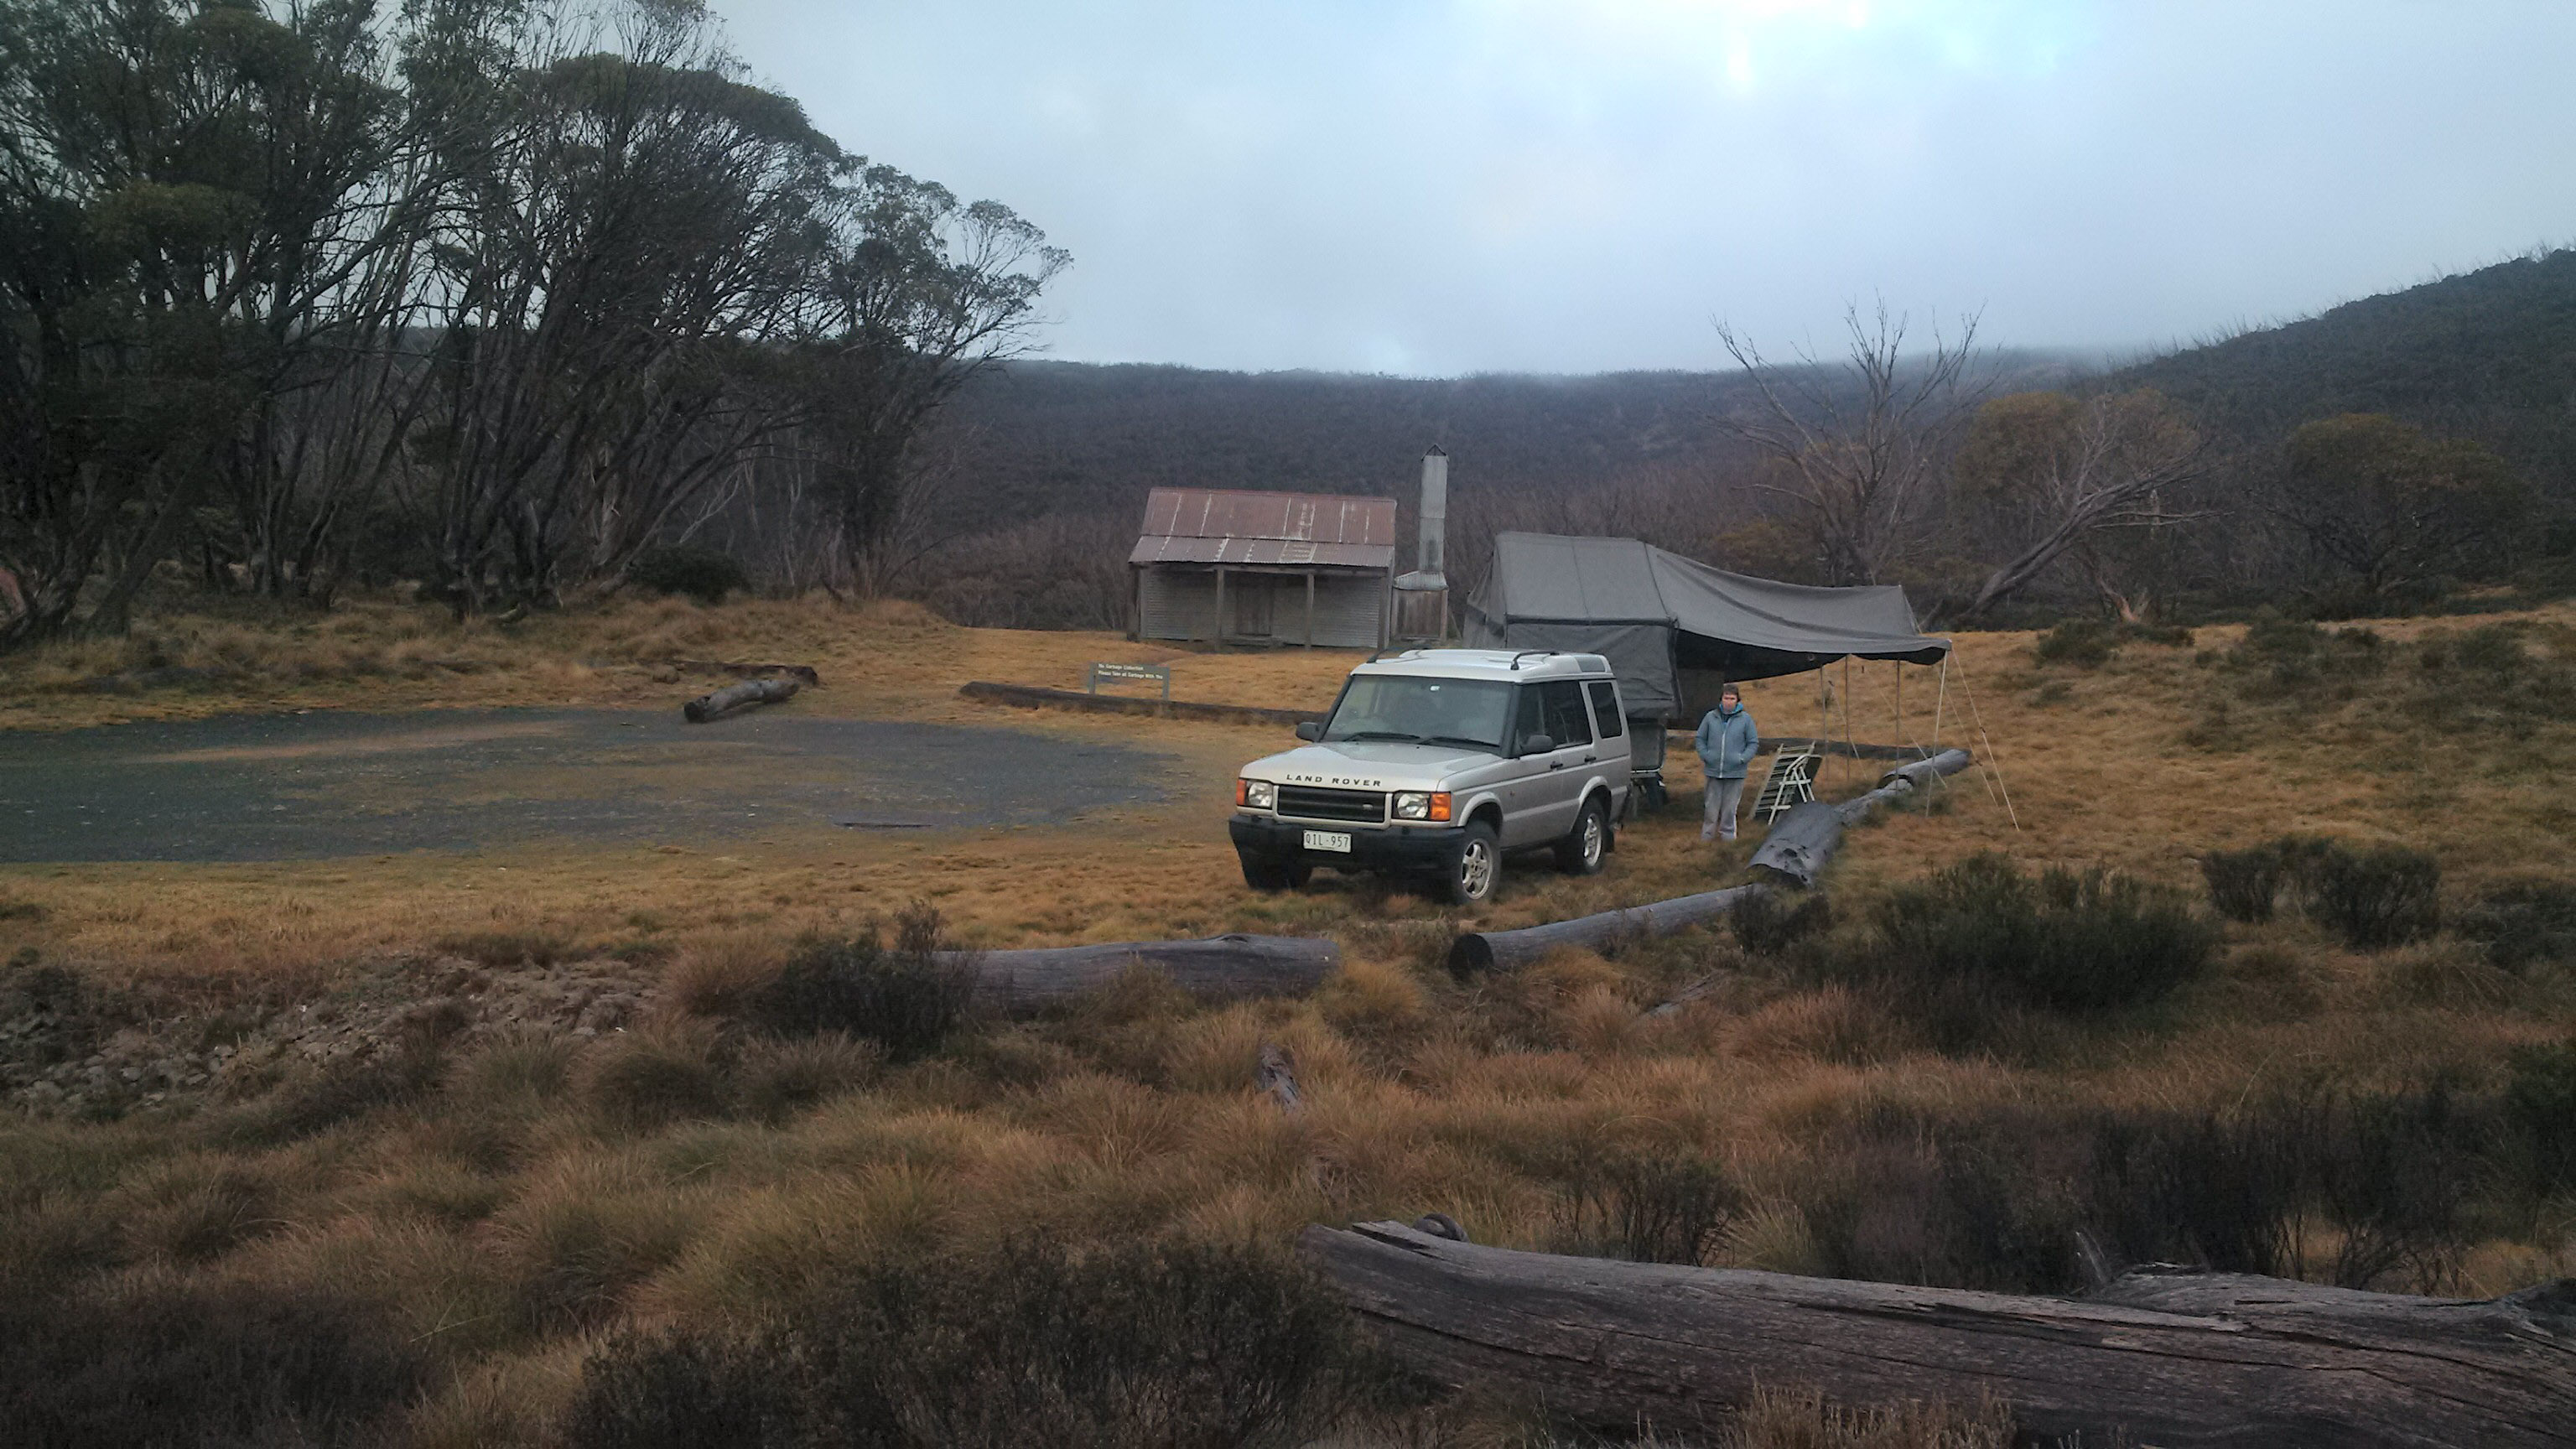
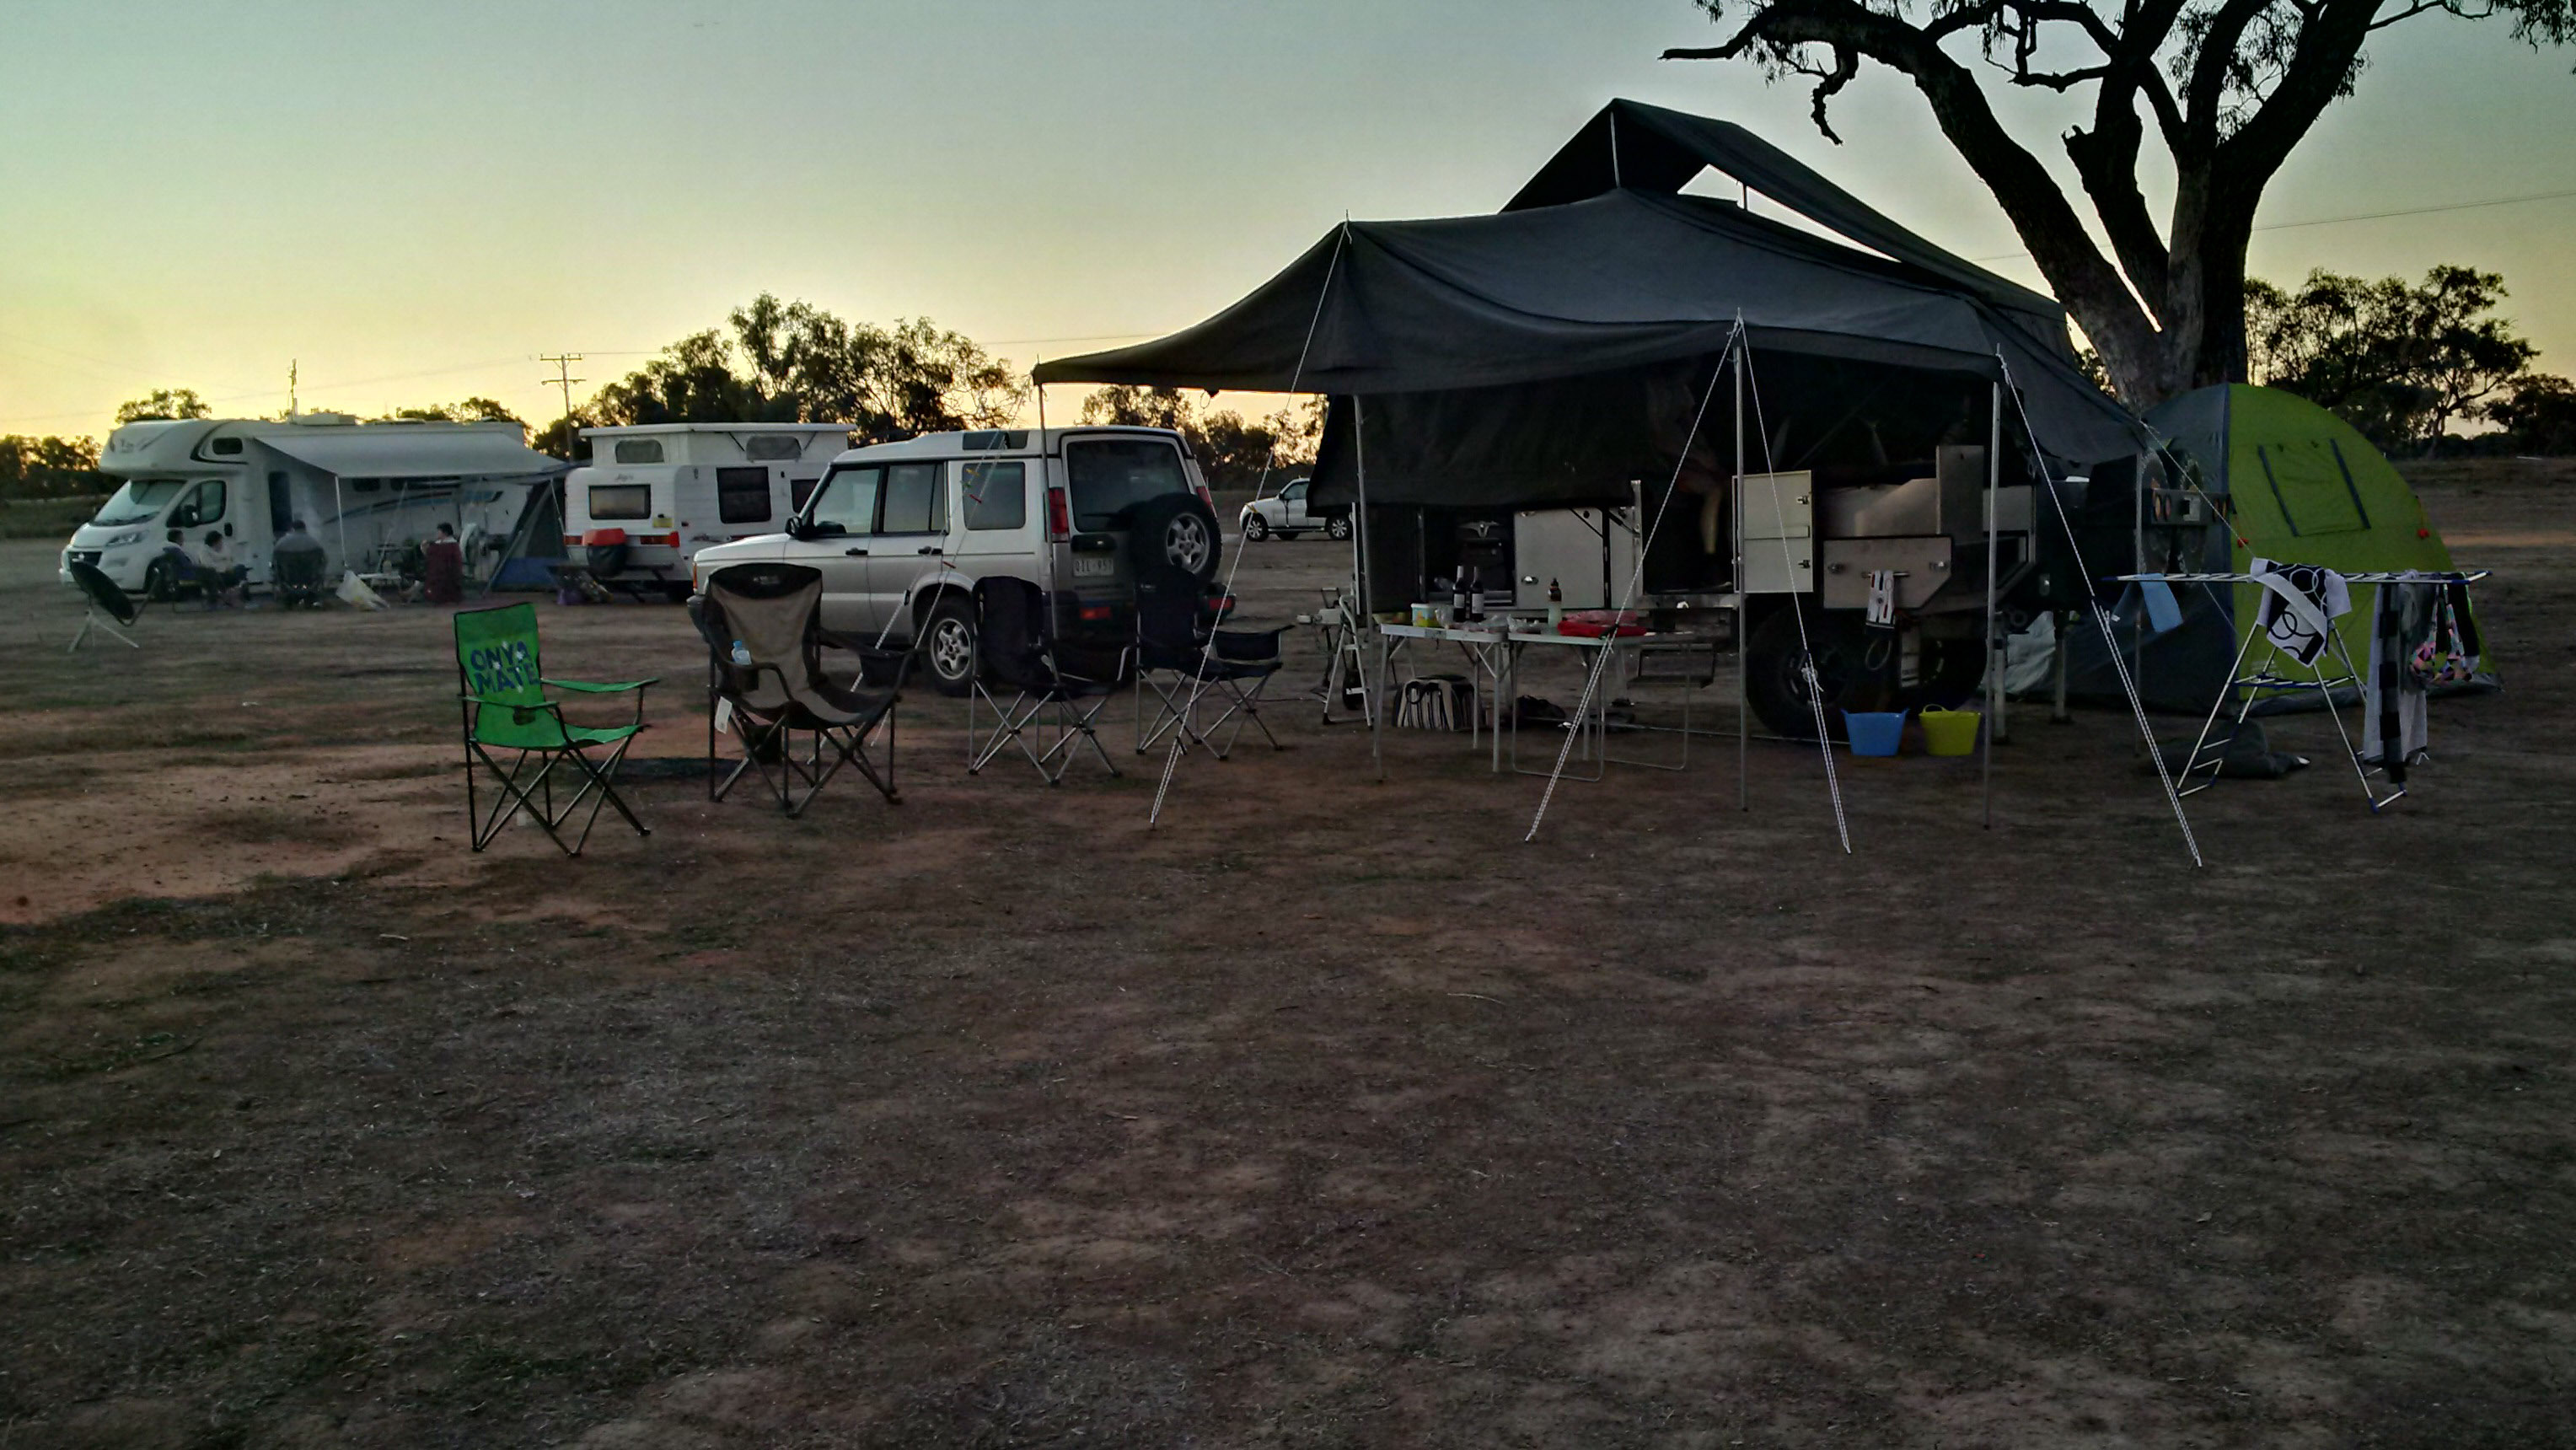
It’s a quick and easy set up – ten minutes from pulling up to having the kettle on. About another twenty minutes to put the annex up – we don’t use the walls though.

There you go. That’s how we ended up owning a forward fold camper.


How to stay warm in the camper with a diesel heater

Our Diesel Parking Heater

A while ago we got a cheap Chinese diesel heater – it was called a Parking Heater and is similar to this.

A heater similar to ours

Ours is a 5KW model which I reckon is overkill so it should heat up the camper very well. They are available up to 8KW in the same packaging. We’ll just put the heater under the camper and run a length of heater duct into an unzipped corner of the rear window.

When we got it there were no instructions at all – not even Chinese. After much Googling I managed to find a manual online. The English was execrable and almost impossible to understand. My gibberish is pretty good but this was in some unknown dialect.

According to the gibberish there are two modes. Thermostatic or manual and apparently older people like the manual mode. Of course there were no clues as to how to change modes. Enter Youtube. A few videos later and I’d got it worked out. Disregarding age I wanted manual mode as the heater was going to be outside and thermostatically controlled means that it would try to heat the entire outdoors using the warm air blowing into the camper. The thermostat is in the heater control panel which will be outside. Manual mode meant that we could just set the heater to “High”, “Medium”, “Low” or some place inbetween.

After much experimenting and Youtubing I worked out that setting the maximum fan speed to 5,000 rpm and minimum fan speed to 2,000rpm with the maximum pump pulse rate to 5Hz and the minimum to 1Hz was just right although that’s subject to change when we use it in anger. According to various user groups running it at 1.5Hz is just right for a camper running it at over 3Hz will heat a camper up very quickly indeed. Once the camper is heated it can be turned down to 1.5Hz or so. The fan speed looks after itself.

The next adventure was getting the little remote, pictured with the heater and hoses, paired with the controller. More Youtubing and I had that done. I wonder how I would’ve got on without Youtube and the work that others had put in making the instructional videos. Thank you one and all.

Resource consumption is quite minimal. It draws less than 20 watts while it’s running but about 100 watts while it’s going through the startup routine and about the same when it’s doing its shutdown thing. It only uses about 100 to 150ml of fuel / hour so about seven to ten hours of heat per litre and about 1.5 to 2Ah / hour from the battery. Seeing as we have about 200Ah of battery capacity we’ll have over 100 hours of heating provided we can keep the fuel up to it. The inbuilt fuel tank and our batteries can easily keep it going for a whole day and night if required provided we don’t go overboard and have the camper at sauna temperatures.

The next thing I need to do is to get a silencer for the exhaust as it makes a howling whining absolute din on all but the lowest settings. The mufflers are cheap but they come from China so delivery will be a month or so away. Apparently it’ll be worth the wait as they are purported to be very effective.

That’s our heater. When our Land Rover has returned from the gearbox doctor and the COVID-19 restrictions have lifted we’ll be off and while we’re away I’ll take a few photos of the heater in operation and post them to this page as well as a report as to how effective it is.

Our new used Discovery 2

What we got and what needs to be done

As mentioned earlier we have got ourselves another Discovery 2. This one is a 2002 model, it’s an automatic with a lot of “stuff” that we didn’t have in the old one. It has leather heated sets, a six stacker CD player/radio, two extra fold up seats in the rear luggage area and it’s an auto. The previous owner has installed a second battery with a Voltage Sensitive Relay as well as the wiring for an Anderson plug at the tow bar. He’s also got rid of the Self Levelling Suspension (air bag springs) and installed coil springs. As soon as I am able the springs go and SLS will be reinstated as currently it has King Springs coils and rides like an unladen truck. He’s also put air helper springs in the rear suspension, probably in an effort to overcome the shortcomings of the coils.

At freeway speeds this car is a lot quieter and is a lot less tiring to drive, probably because of the noise reduction. The previous owner has put a “bull bar” on it as well as an LED light bar which improves the below par performance of the normal hight beam headlights a lot.

For those in the know it has a EU3 16P engine which is an improvement over the 10P engine in the old car. It seems a lot more refined and less clattery although being a Td5 it’s still quite loud.

Cosmetically it is in brilliant condition and all in all I think we have got a good car at a very keen price which makes up for the couple of issues that it has.

Poppy’s Big Car Mk II

It does have a few issues though

The biggest issue is with the gearbox. When we test drove it it worked perfectly. As with any second hand car it has had all of its oils and fluids changed. The engine oil was a bit old and thin but tested OK for no fuel in the oil. Diff and transfer case oils were in good condition as were power steering, ACE (automatic cornering enhancement), and brake fluids. The gearbox was serviced and the auto specialist stated that it was all working properly. Changes nice and smooth and torque converter lockup worked perfectly.

Lockup has now started to misbehave with it only working intermittantly so I took it back to the auto specialist for diagnostics and he said that it was either the torque converter or the valve block. After further diagnostics and a test drive he is of the opinion that it’s the valve block that’s at the heart of the issue. When lockup occurs it happens nice and smoothly with no juddering and not a hint of slip. It’s now booked in for him to have a look at the valve block.

The fuel pump also seems to have issues. When fuel is low it screams a bit which is always a bad sign with a D2 Td5 pump. The fuel gauge, which is integral with the pump,  is also very inaccurate. I had rescued the pump from the old car which was less that 20k km’s old so it’s nearly new. That will replace the one that’s in the new car.

The throttle pedal potentiometer is also faulty and gives “driver demand” faults. I have a spare, known good, one here so I’ll replace that too.

Car is dead

Well that’s it for the engine

After so much crowing about the longevity and reliability of the car it died.

On our way home from a great long weekend  on the Heyfield Tinamba Rd. the timing chain tensioner let go which resulted in this.

Engine kaput

You can see that the timing chain has made an escape bid through the rocker cover and is now quite loose. I should think that the engine would have suffered considerable internal damage. Head, valves, pistons, possibly bent con rods, lots of damage. Pricing a full rebuild caused us to reel in horror. Options of a second hand engine with some sort of recent history and reasonable mileage and with some sort of warranty were both very rare and very expensive. Another car was in order.

After much googling and looking for cars for sale we found two Land Rover Discovery 2’s for sale. Both autos whereas ours is (was) a manual. Lots of reading was done on the pro’s and con’s of an auto and we decided to drive Jenny’s Subaru up to Mansfield to have a look and test drive of one of them. It seemed to be the goods. Reasonable mileage, service record and in great condition. It test drove very, very well too. My biggest concern was the auto but it’s a smooth as silk and does what it’s supposed to.

We got it home and took it to get the roadworthy certificate and all it needed was a new wiper blades and a new windscreen as there were too many chips to make repair viable – far too expensive. After we got the RWC we shot over to VicRoads to get the registration changed into my name. Then came the wrangling with insurance companies, etc., etc. Finally got it all done and behold. Poppy’s Big Car Mk II.

Poppy’s Big Car Mk II


Issues with the car

Water pump, steering pump and radiator.

When we got the car it was known that it had a few issues. Water pump leaking from the bleed hole, steering pump leaking and a pinhole in the radiator. The pumps and the radiator were sourced and fitted by a local mechanic.

The gearbox

One of the issues that the car had was that the gearbox was pretty noisy in fifth gear. It came to us after a hard life towing horse floats so it was bound to have a dodgy gearbox. The R380 manual is known to not tolerate fifth gear under heavy load all that well. When the noise from ours started to sound terminal I took it off to get it rebuilt. Apparently the insides looked a bit like this.

Collapsed rear bearing
Fifth gear looking a bit sorry

These aren’t pics of our gearbox but were offered by the rebuilder as evidence of what it looked like.

Since the gearbox rebuild it’s been going like a trojan but it is driven with a fair bit of mechanical sympathy and fifth gear is never used under full throttle.

Wastegate modulator and hoses.

This little bugger and its hoses can cause a multitude of problems with turbo boost.

Wastegate solenoid

The problem is usually not the solenoid but the hoses cracking and splitting. There are three hoses.

Wastegate solenoid hose
Another wastegate solenoid hose
And the third wastegate solenoid hose

When the hoses crack or split they allow the high pressure feed to the wastegate actuator to leak. That means that the wastegate maintains full boost. The upshot is that an “overboost” fault is logged and the ECU goes into “limp mode” until the overboost goes away. Finding the offending hose and replacing it is only a five minute job and normal service is resumed. It’s a pity it happens so regularly though. The easy way to test the solenoid is to connect a hose between the wastegate actuator and the metal pipe between the turbo and the intercooler. You’ll lose some low end boost but over about 2,000rpm it’s fine.


The head and oil pump bolt.

Well, what can I say ? The engine is a 10p engine which is an early Td5. There were a couple of issues with this iteration of the Td5.

One of the issues was quite common and could easily result in the need for a new engine. In some cases the bolt for the oil pump drive was assembled without any thread locking compound and worked its way loose until it came out and drive to the oil pump was lost. I was lucky, my oil pump bolt, although it had no thread locking compound, was still tight. It was replaced with a new bolt with thread locking compound and was tightened to the revised torque.

Another issue was a propensity for the head to crack around the injector wells and allow fuel to spew into the oil. I would have thought that after about 390k kilometres mine would have been past this happening but no, it happened. I first noticed that the oil was over full on the dipstick when it should’ve been about 500ml down. I took it to my local dealer and they pressure tested the fuel system and found the the head was cracked. I was hoping it would just be an injector o-ring that had let go which is a cheap fix. But no, it was the expensive option which required a new head.


A crack in one of the injector wells

You can see the dyed crack in the pic above. There are places that say that they can repair these cracks but there are also a lot of reports that suggest the outcome wasn’t as good as hoped.

I booked the car in and ordered a new head from Turner Engineering I submitted the order on a Thursday and received the head on the following Monday. Much, much faster than I even dreamed of.

Now started a disaster. I took it all to the local Land Rover dealer and theysaid that the head replacement would take a couple of days. When I picked the car up after four days it had negligible power and coughed and splutterd like a dead one. To ad insult to injury the oil level was still rising. This time I suspected that one or more o-rings had been damaged during refitting the injectors.

This back and forth caper continued for THE NEXT TWO MONTHS. Eventually they got it running tolerably so I took it home. Stuff me but about a month later I received a bill for a considerable amount of labour and a new fuel pump. I wrote them a nasty e-mail telling them that the car had been back for five visits after the head replacement and that if the job had been done right in the first place it wouldn’t have needed to be reworked. Their reply was another invoice. This time I just ignored it an haven’t heard from them for more than a year.

Why didn’t I just do the head replacement myself you ask ? It’s a pretty simple job if long winded but I, at the time, had neither the time nor and undercover work space and the weather was typical Latrobe Valley autumn – cold rainy and windy.

Anyway it’s all done now and the car runs well. The valuable lesson here is that if you need to take the injectors out for any reason be sure to replace the copper flame washers and the o-rings with new, genuine Land Rover parts.

Problems and issues

Of course given the types of roads and the distances we've covered we've had a few problems. All of them have been sorted out by the people at Balance Trailers. These guys really do stand behind their product.

Poles and hoops and water leaks

Our first issue was the top, main hoop failing and a few water leaks at the corners of the canvas. I spoke to Balance Trailers and was asked to bring the camper down to them This is an inconvenience for us as it’s almost a day trip there and back and another one to pick it up. Anyway we took it back to  them. They replaced the pole no problems but the water leaks were a bit more of an issue. It was identified that some Velcro loops along the seams inside the camper had been incorrectly sewn so the canvas had to come off so it could be resewn. The job was done and new waterproofing applied and it’s been happily waterproof since.

The water tank

On our way up to the Birdsville Races at the south end of the Old Strzelecki Track we saw that we had a pretty severe leak along one of the bottom seams of the tank We lost about 100 litres of water and had to improvise for the rest of the trip. When we got home I had a good look at the leak and it appeared that one of the folded and rolled seams had let go. Probably due to the “oil canning” from 100 litres of unrestrained water.

When we got home we contacted Balance Trailers again and they, of course, asked us to bring the camper down. They had a look at it and suggested welding it up. I was opposed to that as a solution as welding stainless steel can make the surrounding metal brittle and it would probably crack and we’d be stuck with a leaking tank again. Nevertheless it was welded against my wishes. Our next trip was a pretty smooth trip with only about 100km’s of dirt road. Of course the tank split and we lost our water. Again we called Balance Trailers and they, this time, offered to replace the tank. One catch. A new tank had to be fabricated and it would take about four weeks. Oh well, what can you do.

We now have a properly baffled and lined tank as well as a new bash plate and mounting straps. The new tank looks a lot better made the the original.

The suspension

While Balance Trailers were replacing the water tank they noticed a couple of minor cracks in the suspension trailing arms. They were replaced without them asking us. They also welded some reinforcement around where the cracks formed on the original arms. It should be bullet proof judging by the appearance and the quality of the welds.

Losing a wheel.

Just outside of Hawker in SA this happened.

The wheel studs had sheared off. Probably due to a design fault illustrated in here.

We had repairs done in Hawker which got us home.

When we got home I called Balance Trailers and, of course, they asked us to bring the camper down. They replaced both brake drums and hubs as well as the wheel bearings. Eventually they refunded us the cost of repairs in Hawker as well as the retrieval.

Another feather in the cap of Balance Trailers.

Modifications to the car

Anderson plug

The first thing to add was an Anderson plug. There has been much written about this in various forums.

I decided that the way to go was a single cable run via a 50A breaker and a Kickass voltage sensitive relay (VSR). The idea of a single run of cable was to use the body/chassis as the negative return path in order to reduce any losses in what is a quite long run. The front end of the cable will be connected to the fuse box on the cold side of one of the large fusible links.

The first thing to do was to get hold of a length of 6B&S cable, a 50A breaker and the VSR. Oh and an Anderson plug and mounting hardware.

The next thing to do was to run the cable and what a pain that was. I decided to start from the back of the car so I soldered an Anderson to the end of the wire sa well as a 6B&S wire to the nearest earth point. These went to another Anderson plug in the rear of the car and the +ve cable was run along the chassis, with much cursing, to where I was going to put the VSR. I found a place and mounted the VSR and connected it all up and ran the wire from it to the 50A breaker and then on to the fusible link. Time to check everything and it all worked perfectly. One last check that all of my crimps were good and that job was ticked off.

I’d allowed an hour for the job but it took nearly three. Although you’d reckon that there would be plenty of room under a Land Rover and along the chassis you’d be wrong. Same as doing anything to a Land Rover I ended up with skinned knuckles and a banged head.

Brake Controller

After lots of asking around and reading and researching I decided on a Tekonsha P3.

I worked out where I was going to put it and mounted it. Right next to the instrument binnacle and the “A” pillar.

Brake controller in place.

So far so good.

Next came the problem of getting the wires from on top of the dash to under it. The plastic trim comes off the “A” pillar easily enough but getting the wires down past the dash was a real pain. One small space and no room to move. I finally got it done. Phew.

There was a handy power connection under the dash so that was utilised and the wire from the brake light switct was easily tapped into. At least there was an easily reachable earth point under the dash so I used that.

Now came the fun part. Getting the wire from under the dash to under the bonnet and down to the trailer connector. I used a length of 8B&S wire that I had laying around and managed to get it through the main loom grommet and down to the chassis and along the rail to the rats next of wiring behind the RHS tail light.

Why of why did I not run the cable at the same time as I ran the Anderson plug cable.

It took a while and a lot of testing with the multimeter and constant reference to RAVE (Land Rover manual) to find the right cable. All I needed to do was to crimp the two together right. Wrong. About an hour later the job was done after taking out the tail light and the grommet for the wiring and pulling the loom up so I had enough room to wield the crimp tool.

Connected up the camper and took it for a test run and it all worked perfectly. It did expose an issue though. The camper brakes are as week as dishwater which is an issue that I’ll address in the future.

Air bag helpers for the rear springs.

Our camper has a fairly hefty ball weight which caused the rear of the car to sag somewhat so after a lot of research I came up with the idea of airbag helpers for the rear springs. It just so happens that Airbag Man has airbags specifically for a Disco 2 at a pretty good price. I went for the heavy duty ones.

Installing them was a simple operation which required a fair bit of patience and muscle. Running the air pipes was, as ever, a bit of a pain but not hard at all.


Air bag in place

The airbags make a huge difference and stop the sag with the weight of the camper on the tow hitch. The rear of the car is nowhere as “bouncy” as it was and it’s a lot more comfortable. With the camper on with over 100kg ball weight I keep the bags at around 30psi and without the camper on board I keep them at around 5psi.

Definately a worthwhile addition to the car and far less traumatic than the Anderson plug and the brake controller to fit.

Modifications to the camper

Batteries and charging

Since we got the camper we've made a few modifications. They've all been to the 12V system so far. Due to a past association I've been able to get Victron stuff at a very keen price so it's all Victron, of course.

First thing that we did was to fit a DCDC charger. The camper had an Anderson plug installed that connected directly to the batteries. A Victron Orion-Tr Smart DC-DC Charger  was chosen and duly installed in the cabinet with the distribution panel. I simply cut the cables from the Anderson plug to the batteries and wired in the DC-DC charger. It can be configured and monitored via a Bluetooth app.

The next step was to put a decent solar regulator in. The regulators supplied with most solar panels are cheap and nasty affairs that would be better off in the spares box for emergency use. Again I chose Victron. I installed a Victron Smart Solar MPPT 100/20 which does the job very nicely. Installing it was dead easy - solar input via a red Anderson plug, the load connected to the power input of the distribution box and the battery output connected to the batteries. This controller also gives you the ability to controlled the load via a Bluetooth app.

Next cab off the rank was a 240V 12V battery charger. Again Victron was chosen. This time it was a Blue Smart IP22 Charger from Victron. Installation is dead simple. The output to the batteries and the input to a 240V mains socket that is already wired into the battery cabinet. Again this is able to be configured and monitored via a Bluetooth app.

The next step was to have a look at the batteries. We have two 100Ah AGM's in parallel which gave us about 100Ah usable capacity although we have been guilty of running the way flatter than that - down to about 10%SOC. While there is nothing wrong with the AGM's - they're only about three years old and haven't been overly mistreated - we'll stick with them. When the time comes to replace them, in five or so years I reckon, I'll be replacing them with the relevant Victron LiFePo4 offerings.

By having good charging capabilities and good battery monitoring we can manage our power off grid much better. We can last about four days without a recharge as our power requirements are modest. With our 250W and 100W panels connected in parallel on a full sun day we can be fully charged well before lunch so we have a considerable comfort margin. If we have a series of zero solar harvest we can always start the car and use it to get at least enough charge to keep us going.

The kitchen tap

In our slide out kitchen we have a cold water tap. With the pump turned on if you lift the tap the water flows. There are a couple of issues here.

  • If you’re trying to do the dishes and you lift the tape to get it up and out of the way you put more cold water in the sink.
  • Lifting the tap is quite hard and tends to turn the tap mount up so that the kitchen slide can’t be closed.
  • The switch for the pump is at the distribution panel on the other side of the camper which is a pain if you need to turn the water on or off when you’re at the kitchen.

Fortunately there is an easy solution. The pump is in the storage box under the seat in the rear of the camper right next to the kitchen. It was an easy matter to put an external waterproof switch right next to the kitchen slide. All I needed to do was to drill a hole for the switch, cut the +ve wire to the pump, crimp on a couple of female spade connectors and connect it all up. Now we can turn the pump off from right next to the kitchen sink. Much better.

A new jockey wheel

we quickly discovered that the original jockey wheel sunk into soft ground a LOT so we started the hunt for something better. We eventually ended up getting Ark XO 750 jockey wheel.  Here’s a pic.

ARK XO 750 Jockey Wheel

This new jockey wheel allowed us to easily push the drawbar sideways to line up the poly block coupling. It’s got a heap of vertical travel which makes it easy to get the camper level on uneven ground before we put the stabiliser legs down.

My view is that if you’ve got a pretty heavy ball weight and a poly block coupling this is the jockey wheel for you.

A winch to help closing the camper

Neither Jenny or I are what you’d call tall or strong so closing the camper posed a problem.

Being a forward fold camper the bed end needs to be lifted over the centre and down onto the lounge section. Using muscle power alone we can get it up to about 30deg from horizontal but no further – we simply don’t have the height or strength. It’s alright for the boys at Balance Trailers (where we got the camper) – they’re six foot balls of muscle.

A cheap, 1000lb winch from ebay was the answer. The boys at Balance Trailers made up a bracket and fitted the winch mounting, the winch and an anchor point for us.

Winch
Anchor point

It was a simple matter to wire it into an Anderson plug and use a fly lead from the battery box. The big advantage was that the winch has a remote control which enables us to quickly fold in the canvas as it goes up and over.

Once it goes over the vertical it falls into place and we go around pushing the canvas in and then close the camper up.

Here’s a couple of pics. One of the camper erected and one of it closed. I reckon you’ll be able to see the issue for us shorties.

Camper when erected
Camper when closed


Changing a Td5 D2 alternator with the fan in place

So my alternator died. It was the last thing I expected but it IS a Land Rover after all.

The first thing to do was to hit the phone and try and source the bits to repair it. They’re available from overseas, at a price of course. The delay in getting them was going to be weeks rather than days. Scratch that idea. Next step was to call around the auto electricians around the area to get it repaired. Oh, it’s a pretty old alternator and we don’t have the parts or yep, we have a replacement but it’ll cost nearly a thousand bucks. Neither of them were viable options either.

Ring the wreckers and I transpired that I could a second hand and tested alternator for about a hundred bucks. That was the solution I went with and duly got my hands on an alternator. All needed to do was change it over.

How had can it be ? It’s only an alternator and the last one I changed years and years ago, on a Land Rover SIII diesel took about half an hour.

It looked easy if the fan was first removed but I couldn’t because some nit-wit ad decided that Loctite was required to keep it from coming off. Bugger.

Anyway here’s how to change it without taking the fan off.

Mine’s a 10P without the EGR cooler but my EGR is in place.

  • Remove the ECU. Probably a good idea to unplug it and give the red plug a GOOD clean while it’s out.
  • Remove the battery tray.
  • Remove the intercooler to manifold hose. Give it a clean while it’s out if needed.
  • Put a bit of cardboard between the fan and intercooler to save it from any damage and to keep at least some knuckle skin.
  • Slacken the belt tensioner and get the belt off the alternator pulley.
  • Remove the belt tensioner. Check the pulley bearing and if it’s a bit sus just replace the whole tensioner.
  • Remove the oil feed fittings from the alternator and engine being VERY careful to not lose the copper washers at the alternator end and the o-ring at the engine end.
  • Remove the top bracket (both alternator and engine end).
  • Get under the car and just cut the oil return hose that runs from the bottom of the vacuum pump to the engine. It’s a LOT easier than trying to get the hose clamp undone with fan in situ.
  • You should now be able to rotate the alternator away from the inlet manifold which will give you enough room (just) to undo the alternator output terminal.
  • Disconnect the vacuum hose.
  • Undo the bottom mounting bolt which is a T50 Torx head. The nut rests in a recess and it’s good to just leave it there.
  • With a bit of wiigling and heaving and shoving you can move the alternator towards the drivers side guard and the a little bit forward.
  • At the back of the alternator there is a connector which needs to be disconnected. You should be able to just squeeze it and it’ll pull out. Of course you won’t be able to squeeze it because it’ll be full of red dirt and other grunge. Pick as much as you can out with a toothpick and eventually you’ll be able to release it.
  • Now comes the fun part. Looking from the front, rotate the alternator clockwise and at the same time tilt the front up and you’ll get to a point where you can lift it out. If it’s in the right position it’ll come out without forcing it past anything.

Fitting the alternator is a reversal of the above apart from the fiddling about getting the oil return hose in position. Don’t forget to put the hose clamps on the hose before you connect it all up. Lubricating the inside of the hose makes life a lot easier too. Put the hose on the engine end and tighten the hose clamp before you do anything else – it’s a lot easier to get to without the alternator there.
Do NOT forget to remove the cardboard behind the fan.

After it’s all done and tested roundly curse the bastard that loctited the fan nut and then have a couple of beers, wines, scotches, whatever.

Our camper

Our camper is a 2017 Balance Trailers forward fold.

Balance Trailers BT20HF forward fold.

As can be seen it’s a pretty large affair. It’s pretty heavy too weighing in at 2 tonnes GTM (Gross Trailer Mass). The end nearest the draw bar is a queen sized inner spring mattress bed while the rear of it is a sort of lounge room which can be converted to a double bed so it can sleep four. The canvas is so called Bradmill Kordux Lightweight. I’d sure like to steer well clear of their Kordux Heavyweight canvas. It’s treated against just about everything up to, and possibly including, nuclear holocaust.

It has a slide out kitchen consisting of a sink with a cold water tap and a four burner stove.The four front lockers hold our Engel 40 litre fridge / freezer which is unbelievably good – it was able to keep the frozen stuff frozen during a string of days over 45 degC. The other three lockers hold plastic tubs for food, cutlery and crockery, the pegs and poles for the annex and our BBQ oven as well as a couple of extension leads and lights, 250W solar blanket, etc. There’s also a narrow full width locker that holds the steps which we need to put the annex up because we’re short. Once the camper is up we can’t open that locker.

On the other side are two more lockers which give access to a 2,000 watt inverter, the 240V battery charger, the DCDC charger and the solar regulator. It’s all Victron and can keep us in power for as long as we like as long as we get no more than four days without any solar panel action or have any other means of charging the batteries. The batteries are also Victron. Two LiFePo4 12.8V 160Ah in parallel.

The water tank under the rear holds 100 litres and there is one 12V pump for the kitchen sink. That’s enough water for us for a week if we are careful to not go overboard.

It all sounds a bit complicated but it really isn’t. From the time we pull up to the time we can get the kettle on is about ten or fifteen minutes. If we take the time to put the awning up it takes another twenty or so minutes. If we do the whole monkey puzzle thing with all of the poles it takes about an hour but we usually don’t. As long as the awning is up the kitchen is covered and if we want to stay out of the weather we go inside rather than put the full annex up. We usually don’t even take a lot of the canvass with us.

Here’s a few photos of the camper both folded up and set up.

Brand new and folded up in the front yard.
And from the rear
A wonky old setup at Bradley’s Hut in the Kosciusko National Park
Set up at Pilaga Bore NSW

Well, that’s our current camper. Before this camper we had an Indigo rear fold camper which we sold for a couple of reasons.

1. It didn’t really suit our needs It was small and light but it was too small and had bugger all indoor room to sit and relax or eat, etc.

2. The chassis broke in Bourke NSW which we managed to get repaired but it left us feeling that we couldn’t trust it.

3. The kitchen really wasn’t a kitchen. No built in stove or sink or drawers, no tap and very small.

Here’s a few photos of it.

Set up at Marla

As you can see the fridge and food boxes needed to live in the back of the car which was not ideal.

Getting down and dirty on the Oodnadatta Track.